

A little bottle perfect for a treat of a few sweets with glitter overlays on the outside of the glass.
This project evolved as I was playing with die cuts of adhesive sheet, microfine glitter, and small bottles bought at the dollar store.

The first one I made of the day was a bottle with knotwork. It was when I added the second element that I thought of making the Princess bottle.
Challenges
Kraftin' Kimmie Stamps Skrappy Challenge: Anything But a Card
Simon Says Stamp Wednesday Challenge: Gift It
Fab 'n' Funky: Glitter and Sparkle
Simon Says Stamp Work It Wednesday: Use Dies
Through the Craftroom Door: Anything Goes
Inspiration Destination: Anything Goes
Southern Girls: Anything Goes
Crafty Gals Corner: Anything Goes
A Bit More Time to Craft: Anything Goes
Supplies


Follow along below and I'll show how I made the bottles and evolved the idea. Warning: this is a long post.
Putting It Together
When working with glitter like this, it's very helpful to have a "glitter try". Dry Swiffer cloths and coffee filters help to contain the mess.

A cheap aluminum pan or shallow box lid lined with dry Swiffer cloths contains the glitter when you're applying it.

A coffee filter allows you to easily pour excess glitter (or embossing powder, or other powders) back into the bottle for use another day.

If you wipe the coffee filter with a dry Swiffer cloth, you can reuse it. When it gets too smudgy, discard and use another, they're pretty cheap.

The first bottle I made was the knotwork using techniques I had watched Els of Elizabeth Craft Design using.
ECD Silk Microfine glitter is the best for this technique but Glitter Ritz microfine works well, too. Chunkier glitters don't adhere as easily to the adhesive sheet and may not only leave small gaps but may come off. The microfine has a gorgeous sparkle and adheres fully for this technique. The glittered areas are smooth.

I die cut a strip of adhesive sheet using a knotwork strip from Spellbinders. I used a Sizzix adhesive sheet because I have it handy and need to use it up.

I partially removed the release paper from one side of the die cut.

I adhered the die cut adhesive to the bottle, keeping one side of the release paper still attached.

Using a piece of wax paper (I didn't have a scrap of release paper handy), I burnished down the die cut in sections as I applied to the bottle.

I continued this until I had wrapped the strip around the bottle. I harumphed at myself fo it being a nudge off and then considered how to hide the join.

I decided to use a second knotwork die cut as a medallion. I wanted it to be slightly dimensional but still transparent-ish. I decided to use a piece of vellum sandwiched between two sheets of adhesive.

After cutting the die, I removed one of the release papers from the die cut.

I dumped glitter over the die cut, brushed it off, and finger burnished it.

The medallion turned out beautiful which is what started giving me ideas for other similar uses. For example, this would make a stand out embellishment on a card.

I removed the release paper from the knotwork strip on the bottle.

I cascaded glitter on to the bottle...

... then brushed away the excess.

Using my fingers, I burnished the glitter into the adhesive which also brings up the shine on the glitter.

To be sure there is no loose glitter, I wipe the bottle with a dry Swiffer cloth.

I removed the release paper from the back of the medallion and...

...attached the medallion over the join of the knot strip. I used the piece of wax paper to burnish the medallion down to fully adhere on the bottle.

The knotwork on the back

The knotwork on the front. Wouldn't this look great with green jelly bean in the bottle as a Saint Patrick's Day decoration or gift?
The silver medallion on the vellum got me to thinking about stamping on vellum. I had a thought that glitter from behind might give the image a bit of sparkle. So I went to try it.

I first dry fit the stamp on the bottle to make sure it was going to fit.

I stamped with Stazon black since it doesn't smear on the vellum. I then painted with Distress Inks and a waterbrush: Spun Sugar, Milled Lavender, Dusty Concord, and Weathered Wood.

I put a sheet of adhesive over the vellum on the painted side. Again I used the Sizzix adhesive sheet because it was handy (and I'm running out of the ECD adhesive sheet).

I looked for a die to use to cut the image and momentarily forgot how small my bottle is. I used the Regal label because the shape looked pretty with the image.

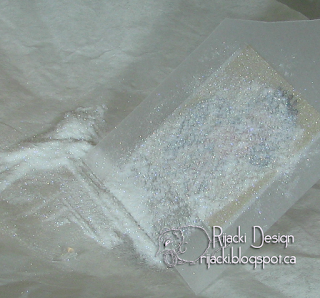
I dumped Cool Diamond over the image. I did the brushing, burnishing, and wiping as well.

The image turned out very pretty and sparkly on the front with the stamped and painted image showing through easily, but....

the Sizzix adhesive sheet had a very thin adhesive which isn't a good for glittering (but is great for thin die cuts to adhere them to a card). I highlighted the spots where the adhesive didn't stay and so are bare of glitter (it's a lot more obvious in person). This made the experiment both a success and a failure. It was successful in showing how a glittered image would look but a failure because the result can't really be used.
So... I decided to try again.

I decided to use the crowned pony. I stamped again with Stazon on vellum.

Thinking of a friend who is a pink fanatic, I painted the princess in pink and purple.

Using Elizabeth Craft Design adhesive sheet, I covered the princess front and back.

I removed the release sheet from the painted side of the vellum, and...
... cascaded the Cool Diamond over the panel.

I brushed off excess, and..

...finger burnished the glitter over the image. The background looks brown because of the colour of the release paper on the other side of the vellum.

I fussy cut the image with a small margin.

After cutting away the outside, I noticed the area of the curve of the tail.

I used a craft knife to trim the inside area. My dollar store cutting make is not self healing. A decent one is on my wishlist.

I used a bit of release paper and burnished the edges to make sure the fussy cutting didn't lift any from the vellum.

I dry fit the princess on the bottle and thought she need a bit more majesty. I went looking through my collection of dies for flourishes that could work.

Like for the knotwork bottle, I die cut the adhesive sheet. I cut the motif into two pieces to surround the princess.

I also cut a few of the smallest motif to go on the back.

I dry fit the princess to determine the distance I would need between the elements.

I cut a bit of scrap for the distance.

I put each of the flourishes on the bottle, placing the second with the spacer.

I placed the three small motifs on the back.

I removed the release paper on the three small motifs first, and

I coated the small motifs with Amethyst, going through the steps of cascade, brush, burnish, and wipe.

I coated the larger side motifs with Teal, going through the steps of cascade, brush, burnish, and wipe.

I removed the release paper from the princess, using a piece of release paper to aid in handling it.

I laid the princess in place and...

...used the release paper to burnish the princess into place.


I wanted to have a picture of the bottles with some jelly beans or other small sweet but didn't have any handy and decided not to do any roadway ice skating.

A cheap aluminum pan or shallow box lid lined with dry Swiffer cloths contains the glitter when you're applying it.

A coffee filter allows you to easily pour excess glitter (or embossing powder, or other powders) back into the bottle for use another day.

If you wipe the coffee filter with a dry Swiffer cloth, you can reuse it. When it gets too smudgy, discard and use another, they're pretty cheap.

The first bottle I made was the knotwork using techniques I had watched Els of Elizabeth Craft Design using.
ECD Silk Microfine glitter is the best for this technique but Glitter Ritz microfine works well, too. Chunkier glitters don't adhere as easily to the adhesive sheet and may not only leave small gaps but may come off. The microfine has a gorgeous sparkle and adheres fully for this technique. The glittered areas are smooth.

I die cut a strip of adhesive sheet using a knotwork strip from Spellbinders. I used a Sizzix adhesive sheet because I have it handy and need to use it up.

I partially removed the release paper from one side of the die cut.

I adhered the die cut adhesive to the bottle, keeping one side of the release paper still attached.

Using a piece of wax paper (I didn't have a scrap of release paper handy), I burnished down the die cut in sections as I applied to the bottle.

I continued this until I had wrapped the strip around the bottle. I harumphed at myself fo it being a nudge off and then considered how to hide the join.

I decided to use a second knotwork die cut as a medallion. I wanted it to be slightly dimensional but still transparent-ish. I decided to use a piece of vellum sandwiched between two sheets of adhesive.

After cutting the die, I removed one of the release papers from the die cut.

I dumped glitter over the die cut, brushed it off, and finger burnished it.

The medallion turned out beautiful which is what started giving me ideas for other similar uses. For example, this would make a stand out embellishment on a card.

I removed the release paper from the knotwork strip on the bottle.

I cascaded glitter on to the bottle...

... then brushed away the excess.

Using my fingers, I burnished the glitter into the adhesive which also brings up the shine on the glitter.

To be sure there is no loose glitter, I wipe the bottle with a dry Swiffer cloth.

I removed the release paper from the back of the medallion and...

...attached the medallion over the join of the knot strip. I used the piece of wax paper to burnish the medallion down to fully adhere on the bottle.

The knotwork on the back
The knotwork on the front. Wouldn't this look great with green jelly bean in the bottle as a Saint Patrick's Day decoration or gift?
The silver medallion on the vellum got me to thinking about stamping on vellum. I had a thought that glitter from behind might give the image a bit of sparkle. So I went to try it.

I first dry fit the stamp on the bottle to make sure it was going to fit.

I stamped with Stazon black since it doesn't smear on the vellum. I then painted with Distress Inks and a waterbrush: Spun Sugar, Milled Lavender, Dusty Concord, and Weathered Wood.

I put a sheet of adhesive over the vellum on the painted side. Again I used the Sizzix adhesive sheet because it was handy (and I'm running out of the ECD adhesive sheet).

I looked for a die to use to cut the image and momentarily forgot how small my bottle is. I used the Regal label because the shape looked pretty with the image.

I dumped Cool Diamond over the image. I did the brushing, burnishing, and wiping as well.

The image turned out very pretty and sparkly on the front with the stamped and painted image showing through easily, but....
the Sizzix adhesive sheet had a very thin adhesive which isn't a good for glittering (but is great for thin die cuts to adhere them to a card). I highlighted the spots where the adhesive didn't stay and so are bare of glitter (it's a lot more obvious in person). This made the experiment both a success and a failure. It was successful in showing how a glittered image would look but a failure because the result can't really be used.
So... I decided to try again.

I decided to use the crowned pony. I stamped again with Stazon on vellum.

Thinking of a friend who is a pink fanatic, I painted the princess in pink and purple.

Using Elizabeth Craft Design adhesive sheet, I covered the princess front and back.

I removed the release sheet from the painted side of the vellum, and...

... cascaded the Cool Diamond over the panel.

I brushed off excess, and..

...finger burnished the glitter over the image. The background looks brown because of the colour of the release paper on the other side of the vellum.

I fussy cut the image with a small margin.

After cutting away the outside, I noticed the area of the curve of the tail.

I used a craft knife to trim the inside area. My dollar store cutting make is not self healing. A decent one is on my wishlist.

I used a bit of release paper and burnished the edges to make sure the fussy cutting didn't lift any from the vellum.

I dry fit the princess on the bottle and thought she need a bit more majesty. I went looking through my collection of dies for flourishes that could work.

Like for the knotwork bottle, I die cut the adhesive sheet. I cut the motif into two pieces to surround the princess.

I also cut a few of the smallest motif to go on the back.

I dry fit the princess to determine the distance I would need between the elements.

I cut a bit of scrap for the distance.

I put each of the flourishes on the bottle, placing the second with the spacer.

I placed the three small motifs on the back.

I removed the release paper on the three small motifs first, and

I coated the small motifs with Amethyst, going through the steps of cascade, brush, burnish, and wipe.

I coated the larger side motifs with Teal, going through the steps of cascade, brush, burnish, and wipe.

I removed the release paper from the princess, using a piece of release paper to aid in handling it.

I laid the princess in place and...

...used the release paper to burnish the princess into place.


I wanted to have a picture of the bottles with some jelly beans or other small sweet but didn't have any handy and decided not to do any roadway ice skating.
This is great! Thanks for joining us at TTCRD xx Jan DT
ReplyDeleteGreat projects. Very creative. Thank you so much for joining us at Inspiration Destination. Good luck!!! Patricia
ReplyDelete