

Up, up, and away! Is it a bird? Is it a plane? It's a... super hero!! err.. heroine!
Supplies


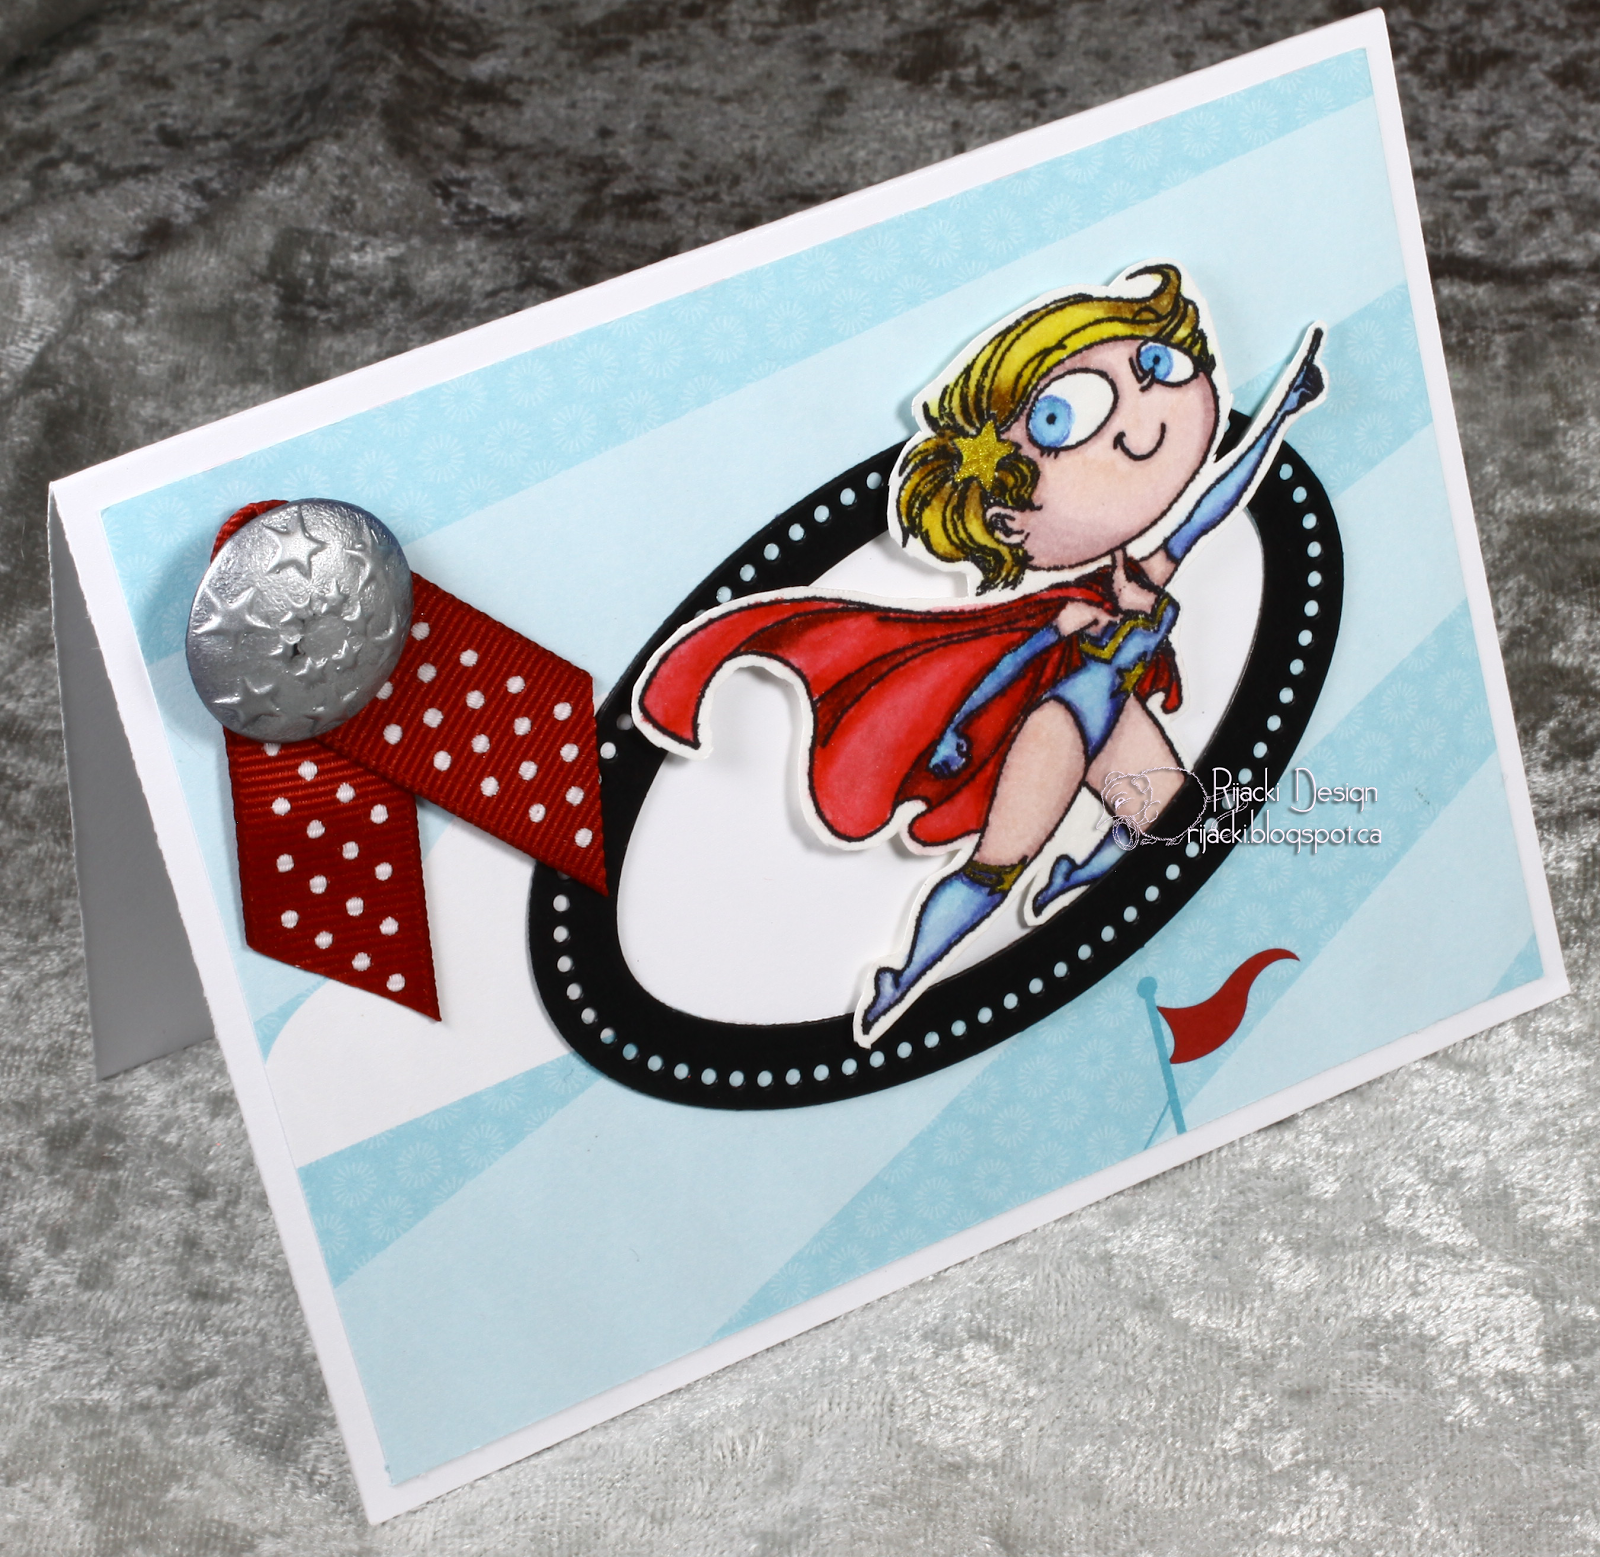
This card started from the button.

I like working with resin and I cast this button from a mold (Cool Tools) last weekend with the last of a batch of resin I had mixed up for some other items. I've cast in this button mold before and really like how it looks. For this time, I brushed the mold with metallic silver powder (finely ground aluminium) and then poured in resin coloured with opaque blue. The end result is a silver button with blue back light. Because there's actual metal in the surface colour, it picks up light like metal casting. I didn't put a surface patina on the button, but, because of the metal, most metal patinas would work well with it.

I like working with resin and I cast this button from a mold (Cool Tools) last weekend with the last of a batch of resin I had mixed up for some other items. I've cast in this button mold before and really like how it looks. For this time, I brushed the mold with metallic silver powder (finely ground aluminium) and then poured in resin coloured with opaque blue. The end result is a silver button with blue back light. Because there's actual metal in the surface colour, it picks up light like metal casting. I didn't put a surface patina on the button, but, because of the metal, most metal patinas would work well with it.

While thinking about this button, I thought about how it would look with a super hero themed stamp and I happened to have just such a stamp in my stash. I stamped the image with black archival ink to be like the cell shading of the comic books. I also chose a spotty red ribbon to go with my super heroine and the super button.

I coloured/painted the image with Distress ink minis and water brushes. I also used a couple Perfect Pearls. I used the Forever Red on the cape in powder form after I painted it in the reds. Perfect Pearls is formulated to bond with water. There was just enough damp in the cape to hold on to the powder for a light transparent sparkle. I used gold on the trim and stars of her outfit, applying it wet so it would be thicker and opaque. I loosely fussy cut the heroine, leaving off the stars. She's pointing at all the colours I used for her *laugh*

I found a background in my stash, long retired designer paper from Stampin' Up. My local enabler... err demonstrator was de-stashing a few months ago and I picked up a bunch of retired papers. I also used an oval I cut for a previous project but didn't align the hole die up quite perfectly. For this card, the imperfection could be covered by the image making it a perfect place to use it. I had tried to make a bow but failed miserably *laugh* But, I rather like the 2 'flags' better for this card.

When assembling the card, I lined up the oval frame on the oval I cut in the patterned paper. I had cut the oval in the background at a slant to continue the upward aspect of the heroine. Here you can see where the dots are too close to the edge for part of the oval. I hate it when dies shift while running through the Big Shot.

Putting the rest together: I put foam mounting tape on the parts of the heroine that would not be tucked under the oval so they would have dimension. For the leg partially under the oval, I used the same tape runner as the rest of the background to attach it directly to the card base. The heroine rises out of the oval on a slight angle which gives a nice 3D effect. The button and ribbon are attached with Glue Dots since those work great for multi-surface dimensional stuff.


I coloured the inside stars with a bit of Mustard Seed. I left the rest of the inside empty because I didn't have the 'right' sentiment in my stash. I told my sweetie that this morning and he laughed. He agreed that I do need more things to fill that gap.. or that I would be getting more to fill it *laugh*. I was surprised, though, that I only have one "super", the one with this stamp set, but it's a "superstar" and not really maskable to be only 'super' or I could have built my own sentiment with a 'super', such as "have a super birthday" (I was surprised none of my birthday sets have that, then again, I don't have many sentiment sets, really).

Challenges
Kraftin' Kimmie Stamps Saturday challenge: Buttons
The Crafter's Cafe: Feminine
Aurora Wings: Frame it
Simon Says Stamp Monday challenge: It's a Frame Up
Simon Says Stamp Wednesday challenge: Going Dotty
Crafty Friends: Cute
The East Wind: Celebrate the Women
Emerald Creek: Dream a Little Dream
Art Impressions: Dots and Stripes
Addicted to Stamps and More: Anything Goes
I like it very, very good !!!
ReplyDeleteThanks for joining Crafty Friends
DT Laura
So cute, Rijacki! Love how you've framed Super Heroine and the dotty ribbon that matches. Thanks so much for coming back to join us at Aurora Wings. xxD
ReplyDeleteLove your beautiful and adorable card! Thank you so much for sharing with us at Simon Says Stamp Monday Challenge. :)
ReplyDeleteWonderful card Kate! The image is so cute and you've coloured it beautifully.
ReplyDeleteThanks for joining us at Simon Says Stamp Wednesday Challenge
Mandy xx
Wow! I really admire people who can do such professional looking cards, Rijacki! Yours is just so perfectly done and the colouring is awesome. As is the design! Love it!
ReplyDeleteThank you for sharing it with us at Emerald Creek Dares!
Claudia xx
A lot of work went into this card, Rijacki, and it was well worth it. It is fantastic!! Thanks for sharing it with us at Addicted to Stamps and More.
ReplyDeleteHello… Thanks for joining our ‘Cute’ challenge with your lovely fun card… Love the photos of how you created your card. Please join us again next time. Good luck!
ReplyDelete[Diane Louise, Team Leader for Crafty Friends Challenge Blog]
I absolutely adore this card! Here here to all the super women out there! Thanks for joining us at Kraftin' Kimmie Challenges.
ReplyDelete