

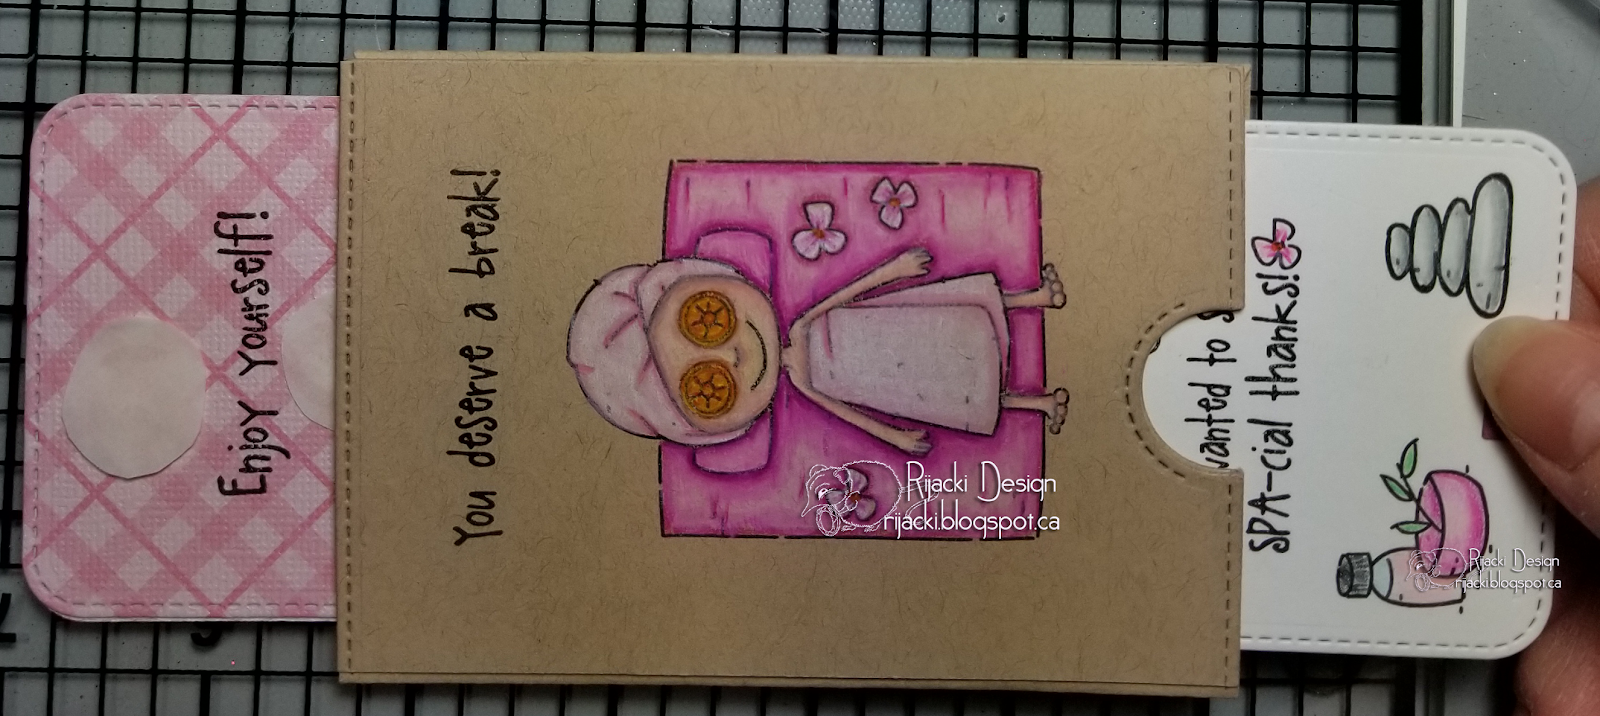
Ahhh! A relaxing day at the spa. This card holds a surprise. Pull on the tab and two panels will appear, one which will have a gift card.

This double-slider surprise card features a brand new stamp set from Kraftin' Kimmie Stamps with Prismacolor colouring and a Lawn Fawn interactive die set.
Putting It Together
I love the Double-Slider Surprise die set from Lawn Fawn. It makes such a fun interactive card. I decided to use the die set to make a gift card holder 'cause who wouldn't want to get a gift card for a spa day.

I stamped the image with Wicked Black on Toned Tan paper and coloured with Prismacolor pencils.

For the surprise panels, on one, I stamped several of the small accessory images from the set and colour then. with the Prismacolor pencils. Since the other panel would be covered by a gift card, I used a pattern paper, pink plaid, and stamped it with a sentiment that would be revealed after the gift card is removed.

The parts: two surprise panels, one top panel trimmed from a chamber side, two sides, the inner mechanic piece, and a strip of thick plastic bag.

The plastic is wrapped around the mechanism with a strip of double-sided tape to hold it to itself in a loop. The plastic strip should move freely, sliding back and forth. The mechanism piece should be a heavy cardstock so it doesn't get bent when the panels move.

The surprise panel to come out the bottom gets adhered to the plastic strip on the back at the top with more double-sided tape making sure the plastic strip can still move freely.

On my card, the panel to come out the top is the one intended to hold a gift card. I added two dots of removable Glue Dots covered with release paper. Just remove the release paper and press the gift card in place.

The panel gets attached to the plastic strip on the face at the bottom also making sure it's connected only to the plastic strip and the strip can still move freely.

You can carefully slide the two panels in and out at this point.

The sides are each attached to the long parts of the mechanism with double-sided tape. If you slide the surprise panels over, you can more easily avoid getting them caught in the adhesive.

The sides are them folded over to the other strip of double-sided tape on the other side. Again, moving the surprise panels side to side can make it easier to avoid catching them in the adhesive.

The sides should only adhere to the long sides of the mechanism and the other side piece with the plastic strip and surprise panels free between them.

Now the surprise panels should slide in and out more easily. It might take a bit of tug to get the slide to start but then it should slide to reveal the surprise panels.

I then put the decorated front panel on with tape runner.
And played with the slider again, of course.

I decided to add the double slider to a card. I did a dry fit with pink glittered cardstock, a pink enamel heart, pink ribbon, pink flowers, and a gold glittery arrow for the pull tab. Is it pink enough?

To attach the double slider to the card, I used foam mounting tape. This gives the slider a bit more room to work.

I tucked the ribbon ends under the glittered cardstock before adhering everything to a white card base.

Inside, I added another of the accessory stamps and coloured it with the Prismacolor pencils leaving it black for personal messages.

Supplies
Challenges
Fab n' Funky: In the Pink
Watercooler Wednesday: Feminine
Creative Craft Cottage: Add a Heart
Outlawz Festive Friday: Theme - Anything Goes
Addicted Stamps and More: Photo inspiration
Sweet Sentiment: Palette
Watercooler Wednesday: Feminine
Creative Craft Cottage: Add a Heart
Outlawz Festive Friday: Theme - Anything Goes
Addicted Stamps and More: Photo inspiration
Sweet Sentiment: Palette

| 
|
WOw, I love this cool idea for a gift card!! SO super cute!
ReplyDeleteBeautiful gift-card. Thank you for joining us at Creative Craft Cottage challenge good luck. Have a nice day
ReplyDeleteAnneke DT
This comment has been removed by the author.
ReplyDeleteWhat a great interactive card! I really like the detailed tutorial on how you created this.
ReplyDeleteThank you for sharing your wonderful work in our ATSM challenge & we hope you will join us again in the next ATSM Challenge!.
Anna – Design Team member at Addicted to Stamps and More
Visit my blog - Crafty Anna Studio.
You can also find me on Instagram - CraftyAnna Studio
Thank you!
Thanks for the tutorial!
ReplyDeleteLovely card!
Thank you for sharing with Addicted to Stamps and More!
Susan
Addicted to Stamps and More
Calling All Crafters! – My personal Blog!
Such a fun card and beautifully explained..Thank you for joining in Addicted to stamps and more - Bling it challenge
ReplyDeleteSwapna Patil(DT)
Beautiful!! Thank you for joining us at Creative Craft Cottage Challenge this time and good luck :)
ReplyDelete