

I love the versatility of digis. I used 3 sizes of Sheepski Designs Jo's Daffodils to make 3 items each foiled using a Cricut Maker. The watercolouring is with Nuvo Shimmer Powder, the faux leather wrap journal is from a Sizzix/Eileen Hull die, and the faux leather wallet is from a Cricut project.
Jo's Daffodils is being offered as a freebie at Kit and Clowder this week.
SheepSki Designs Challenge Blog
SheepSki Designs Etsy shop
SheepSki Designs FaceBook group
Putting It Together
As the old saying goes, when you have a hammer everything looks like a nail. I got a Cricut Maker and Foil Quill for my birthday (12 Feb) and want to use it on everything! or at least experiment with using it on a variety of things.
Making a PNG from a JPG digital stamp
Many digital stamps are available only as JPGs which have a solid, white background. The Maker, as well as other digital cutters and many printers, would want to draw or cut the background, so that won't do. Two choices, either see if the artist has a PNG with transparent background available or convert the JPG. If the first isn't an option, converting isn't hard but does require some software. Adobe Illustrator and Inkscape are two that can do the job easily and Inkscape is FREE.

Open the digital stamp file in Inkscape and accept the defaults on the opening screen.

With the image selected, choose Path > Trace Bitmap from the top menu.


Your image will have duplicated for the number of scans or colours. With a black and white image, there will be only two. Move the top one to the left and delete the original in the centre.

Save the remaining image as a PNG by choosing File > Export to PNG.

The window to save the file will show up on the right panel. Save the file to the place and name you want. You can leave the rest as defaults.

If you open it in an image editor, like Photoshop or Gimp (Gimp is a FREE application a lot like Photoshop), that displayes a transparent background (generally as a checkered background), you'll see the background is now transparent with only the line drawing. Ta da!
If you want better instructions and a visual of the process (but using a full-colour image), check our this video from PattyAnn: https://youtu.be/QPp5EkKp6z0
Cricut Design Space
Each of the digital cutters has it's own application for importing and manipulating images, creating projects, and starting the processes on the machine. The Cricut Maker uses Design Space. The applications for Sillhouette and Brother likely have similar features but have their own way of doing them.
In Design Space, you need to upload the PNG file from your computer. Be sure to use the PNG with a transparent background and not the original JPG with white background. Once the image is uploaded, it can be inserted into the project canvas. Select the image and Insert.

In the canvas, it can be resized or turned or combined with other images and/or shapes. For the Foil Quill (or marker) you want to select Draw as the Linetype before clicking the Make It button.

The first step of Make It is prepare. You can reposition the image on the mat. Sadly, this repositioning is not saved with a project. Cricut Design Space assumes you will want to have your materials in the upper left corner. Just move the image where you want the draw or cut to occur. You can also resize and re-orient the image on the mat step. If you want to flip it horizontally, select Mirror.

When you have the image where you want it on the mat and click Continue. In the next step, you'll need to select the material. I'm not sure (yet) how much the material selection here affects the draw, but it definitely affects a cut. For the Arches paper, I used 140 GSM Watercolour Paper. For the vinyl faux leather, I chose Faux Leather. There are a lot of material types available for the Maker. On the next step, it will tell you what items you need in the blade holders for your material especially when you're cutting.

Before continuing, I needed to prepare the actual mat. I made sure my material was no bigger than the mat (I currently only have the two 12x12" mats that came with it with a 12x24" on order now) and pressed it down. I then cut a piece of foil to cover the area that would have the draw and used washi tape to hold it down on all four sides. Oh and I plugged in the Foil Quill back up there before I started working on the image in Inkscape to make sure it had time to warm up :) The Foil Quill goes into the pen spot. Foil Quill works with each of the digital cutters with a different cowling to fit the pen spot.

Put the mat in place, click Continue on the Design Space, click the mat load button on the machine, click the Cricut go button on the machine, and wait.... Either get mesmerised by the way the image is being drawn on the foil or go do something else. The more complicated the image, the longer it will take. (I suggest doing a test run of the foil on a scrap of the material if you're not 100% sure it will work on it.) As a side note, I keep the USB cable of the Foil Quill out of the way by draping it over the open lid of the Maker. The Quill can move freely and no risk of the cable getting in the way.

After the drawing is done, you can see where the Quill did its work.

And then the reveal... I love peeling off the foil for the magic surprise.

I use a soft brush to brush away any loose foil bits 'cause I completely forgot to move the 'star rings' to the side before starting to foil. Any of the foil that didn't get heat won't stick. The foil that was heated won't rub off.
Foils for the Foil Quill
Foils that only transfer with heat such as Foil Quill branded and likely most or all foils for foil hot plates (like the Go Press and Foil, Glimmer, and Gemini Foil Press) should work. Transfer foils that can use adhesive, such as DecoFoil, most likely won't work since they're made of a different substance.
If it's not Foil Quill foil, try it on a scrap of your material first before your project. Top is the Cricut marker, middle is Foil Quill, bottom is ToDo (a European brand I got as a 'doorbuster' from a local scrapbooking store). This was also before I learned when/how to move the image to a different position for the draw/cut. The shrew with a gem is the logo my dear friend Lia Graf made for me several years ago when I was making jewellery. I still love it as a representation of my crafty self.
Watercolour on Foil
My hope was that the marker/pen which came with the Maker would be like a hybrid ink and dry waterproof so I could use it to transfer digis on to watercolour paper my printer chokes on.

After drawing with the marker on Arches cold press, I used a heat tool to try to 'fix' the ink and speed the drying. I then swiped the drawn line with a waterbrush. Nope. *sigh* The combination of paper and that ink doesn't work. I also tried one of the cheaper alcohol marker's blending marker on the ink and it was smudgy, too, not that Arches cold press would be good for alcohol marker, but just to try the ink on that surface.

But, the Arches foiled beautifully. It's not a full resist like embossing or foil transferred via adhesive, gel, or embossing, but still gorgeous (and makes me want more foil colours that will work with the Foil Quill). I missed a little on the top and bottom because I misjudged how long to make the patch of foil and the quill doesn't work over the washi.

Just as I was about to pull out watercolours, I got a package that had a couple Shimmer Powders and an idea burbled up. I decided to use water and Shimmer Powder for something a little different than just watercolouring.

More water, more powder, a little moving it around with a waterbrush... the Arches cold press can handle a lot of water.

In the end, after drying it with a heat tool, I was rather pleased with the abstractness. The missed foiling at top and bottom aren't even an issue. Ironically, these were colours already in my stash and not my two new ones. I had to stop here for the night because I was about to turn into a pumpkin 'cause I stayed up later than my 'bedtime' (darn the wake-up time for the day job).

I thought about the watercolouring all day and decided to add in some shadowing with a small brush to punch it up a little. I used the Maker to cut a simple frame from Bristol paper. I'll put it in a sturdier frame later, leaving the Bristol as a border. The picture is so shimmery and the mat gold lines are gorgeous with the shimmer.
Foil on Faux Leather
I wanted to do something different with the digital image and when I saw how the foil worked on kraft and learning how to move the 'draw' to a different position, I wanted to try the foiling on faux leather with a thought to using the daffodils in a completely different way.

I got the Eileen Hull Bigz XL die for the Wrapped Journal a few months ago and just hadn't used it yet. I first used the die and Big Shot Plus to cut the material then used the Maker to add the foil. For more about how I put it together, check out this other post (so I don't make this one too long): https://rijacki.blogspot.com/2020/02/Jos-Daffodils-foil-on-faux-leather.html.

Looking for something to cut with my new Maker, I perused the Cricut projects in the Design Space for one which would work with the faux leather and that I could also foil with the daffodils. The size of the daffodils is a nudge smaller than on the wrap so it would fit on the flap. For more about how I put it together, check out the other post, too: https://rijacki.blogspot.com/2020/02/Jos-Daffodils-foil-on-faux-leather.html.

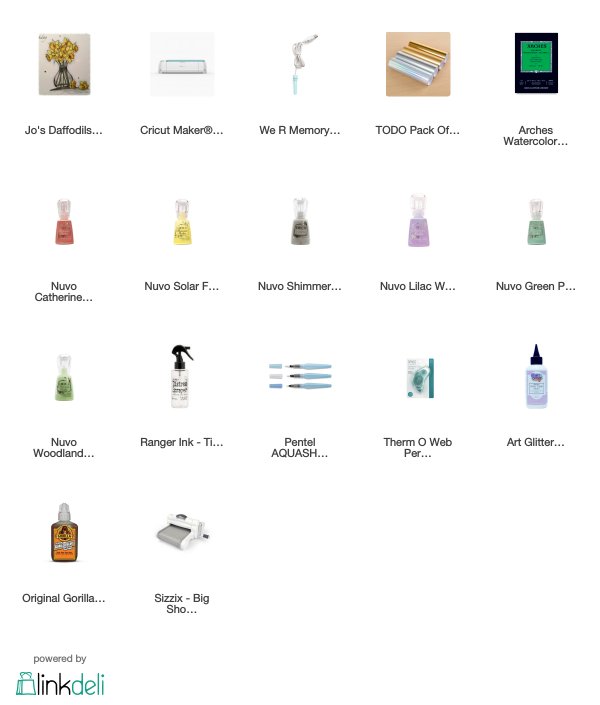
Supplies
Challenges
Outlawz Festive Fridays: Theme - Anything Goes
Incy Wincy: Anything Goes
Through the Craftroom Door: Anything Goes
Creative Moments: For the Girls - Anything Goes
Penny's Paper-crafty: Anything Goes
Thank you for your step-by-step photos of your project. I also have the We R Memory Keepers Quill and enjoy the reveal each time I peel of the foil. The only material I've tried the Quill on is a pencil. Thank you for sharing your creation with us @ Incy Wincy Designs Anything Goes Challenge. Good luck!
ReplyDeleteWOW! Fantastic project. Thanks for sharing with us at Creative Moments.
ReplyDeleteReally awesome Rijacki, I love how the image looks foiled and that amazing abstract water coloured background!
ReplyDeleteAndrea x
Gorgeous! Thank you so much for playing along at Penny's challenges.
ReplyDeleteHugs
WOW!!! I'm so impressed. You've done a fantastic job with this project!! I love the look of it on the faux leather.
ReplyDeleteThanks for sharing with us at Penny's, and good luck with your entry! :)
~ DT Saphron
Lemon Biscuit