Each of the digital cutters has it's own application for importing and manipulating images, creating projects, and starting the processes on the machine. The Cricut Maker uses Design Space. The applications for Sillhouette and Brother likely have similar features but have their own way of doing them.
In Design Space, you need to upload the PNG file from your computer. Be sure to use the PNG with a transparent background and not the original JPG with white background. Once the image is uploaded, it can be inserted into the project canvas. Select the image and Insert.
In the canvas, it can be resized or turned or combined with other images and/or shapes. For the Foil Quill (or marker) you want to select Draw as the Linetype before clicking the Make It button.
The first step of Make It is prepare. You can reposition the image on the mat. Sadly, this repositioning is not saved with a project. Cricut Design Space assumes you will want to have your materials in the upper left corner. Just move the image where you want the draw or cut to occur. You can also resize and re-orient the image on the mat step. If you want to flip it horizontally, select Mirror.
When you have the image where you want it on the mat and click Continue. In the next step, you'll need to select the material. I'm not sure (yet) how much the material selection here affects the draw, but it definitely affects a cut. For the Arches paper, I used 140 GSM Watercolour Paper. For the vinyl faux leather, I chose Faux Leather. There are a lot of material types available for the Maker. On the next step, it will tell you what items you need in the blade holders for your material especially when you're cutting.
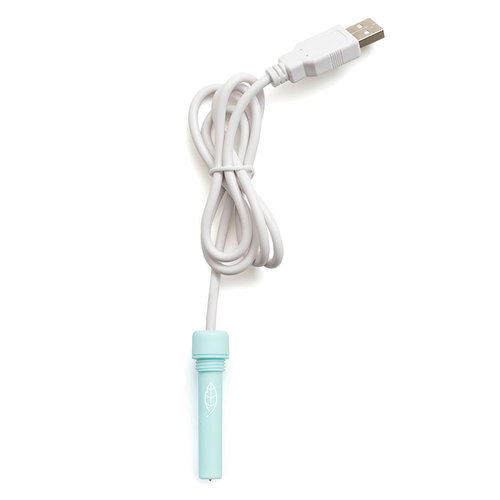
Before continuing, I needed to prepare the actual mat. I made sure my material was no bigger than the mat (I currently only have the two 12x12" mats that came with it with a 12x24" on order now) and pressed it down. I then cut a piece of foil to cover the area that would have the draw and used washi tape to hold it down on all four sides. Oh and I plugged in the Foil Quill back up there before I started working on the image in Inkscape to make sure it had time to warm up :) The Foil Quill goes into the pen spot. Foil Quill works with each of the digital cutters with a different cowling to fit the pen spot.
Put the mat in place, click Continue on the Design Space, click the mat load button on the machine, click the Cricut go button on the machine, and wait.... Either get mesmerised by the way the image is being drawn on the foil or go do something else. The more complicated the image, the longer it will take. (I suggest doing a test run of the foil on a scrap of the material if you're not 100% sure it will work on it.) As a side note, I keep the USB cable of the Foil Quill out of the way by draping it over the open lid of the Maker. The Quill can move freely and no risk of the cable getting in the way.
After the drawing is done, you can see where the Quill did its work.
And then the reveal... I love peeling off the foil for the magic surprise.
I use a soft brush to brush away any loose foil bits 'cause I completely forgot to move the 'star rings' to the side before starting to foil. Any of the foil that didn't get heat won't stick. The foil that was heated won't rub off.
Showing posts with label Foil Quill. Show all posts
23 February 2020
Jo's Daffodils - watercolour, foil, Cricut Maker
I love the versatility of digis. I used 3 sizes of Sheepski Designs Jo's Daffodils to make 3 items each foiled using a Cricut Maker. The watercolouring is with Nuvo Shimmer Powder, the faux leather wrap journal is from a Sizzix/Eileen Hull die, and the faux leather wallet is from a Cricut project.
Jo's Daffodils is being offered as a freebie at Kit and Clowder this week.
SheepSki Designs Challenge Blog
SheepSki Designs Etsy shop
SheepSki Designs FaceBook group
Jo's Daffodil's Wrap Journal & Wallet - foil on faux leather
I love the versatility of digis. I used 3 sizes of Sheepski Designs Jo's Daffodils to make 3 items each foiled using a Cricut Maker. The faux leather wrap journal is from a Sizzix/Eileen Hull die, and the faux leather wallet is from a Cricut project.
Jo's Daffodils is being offered as a freebie at Kit and Clowder this week.
SheepSki Designs Challenge Blog
SheepSki Designs Etsy shop
SheepSki Designs FaceBook group
SheepSki Designs Challenge Blog
SheepSki Designs Etsy shop
SheepSki Designs FaceBook group
14 February 2020
Happy Birthday to me! - Cricut Maker and Foil Quill
On Wednesday, 12 Feb, it was my birthday. My sweetie has been listening to me pining for a Cricut Maker for months, many months, since it first came out. So... he decided to surprise me and get me one. And it is a pretty blue and white (he knows I am not fond of pink, thankfully).
We picked it up at out mail agent in Blaine, Washington (cheaper and quicker shipping to a US location) along with a few other packages and then went on to Bellingham for a little shopping.
I spent a little time in Tuesday Morning and found the Foil Quill (in almost the same blue!) another thing I have been wanting since I saw it last year and helped fuel my desire for a digital cutter.
Unboxing!
I had to find a spot for the new toy. I moved my guillotine and heat tools off the top of my basket drawers. I eventually had to move my backgrounds box, too, for the USB cable to reach my computer on the other side of my desk.
The first thing out of the box is the friendly getting started box. (Doncha love my messy desk?)
The Maker was double wrapped in squishy foamy wrapping and shrink wrap. The foamy I can understand to keep it from dings, but the shrink wrap is just extra plastic packaging :(
Inside the getting started box was a CD shaped "Open me first" envelope. I rolled my eyes for a moment thinking they had put a CD in the box, but... it was a series of 4 cards with 4 exceptionally easy steps.
And... drum roll... my very first cut! I used the starter pack while following the directions for setup and all.
![]() | ![]() |
I've been spending some time figuring out how to use the Maker and Foil Quill, especially in conjunction with my own collection of image files and supplies. I even already have some vinyl in my stash for die-cutting with my much-loved steel-rule dies (but now I want more more more *laugh*). I don't have the knife blade yet (but Cricut has a sale this week *laugh*) so I am limited to shallower cuts until I get it.
From my own experimenting already, I have ideas brewing in my head and posts (and possibly videos) to make. I did get some bumps toward a head start by a fellow crafter in the Kraftin' Kimmie Friends group ('cause I was bubbling over with "squee" and had to tell someone so I made a post there) and that got me leaping ahead like a gazelle. In addition to the Cricut Design Space, I'm also going to be learning Inkscape which is remarkably like Illustrator but it's been a few years since I worked with Illustrator so I am rather rusty on it.
Inkscape is to Illustrator as Gimp is to Photoshop. They're open-source (Free!) full-featured applications. They have features very very similar to the Adobe products but enough differences in the controls that if you're used to the Adobe ones the controls might trip you up a bit (which is why I struggle with Gimp, it's just enough not Photoshop to frustrate me 'cause I don't have the knowledge of how it does the same thing differently and don't use it often enough to remember). But FREE is great for my computer upstairs. (I have an OLD copy of Photoshop and Illustrator and a few others I bought several years ago, CS4 *laugh*)
Inkscape
Gimp
And now I am off to a fabric store... Happily, as part of the room swap I did last year, my sewing machine is actually in a usable location. One of the reasons I wanted the Maker is because of the rotary blade to cut fabric :)
Side Note: I still love my Big Shot and will be using it, too. The Maker and Big Shot do different things, really, in different ways.
Other side note: The Cricut limitation that vexes me (and I couldn't get an answer on before I got one) is that there is no built-in way to do cuts on stamped images and no way to 'grow' an imported image for a cut line. The Print and Cut feature is handy and does, I think, do a margin automatically, but no control over how much of a margin. Thus the need for Inkscape/Illustrator and Gimp/Photoshop and even an external scanner (which I have, if it works -- I haven't tried the one on my printer and my external one finally died after more than a decade in service).
Supplies
Subscribe to:
Posts (Atom)