

This is the second month of the Sheepski Designs Blog Challenge and I am one of the Design Team. Here is my inspiration for the month of May.

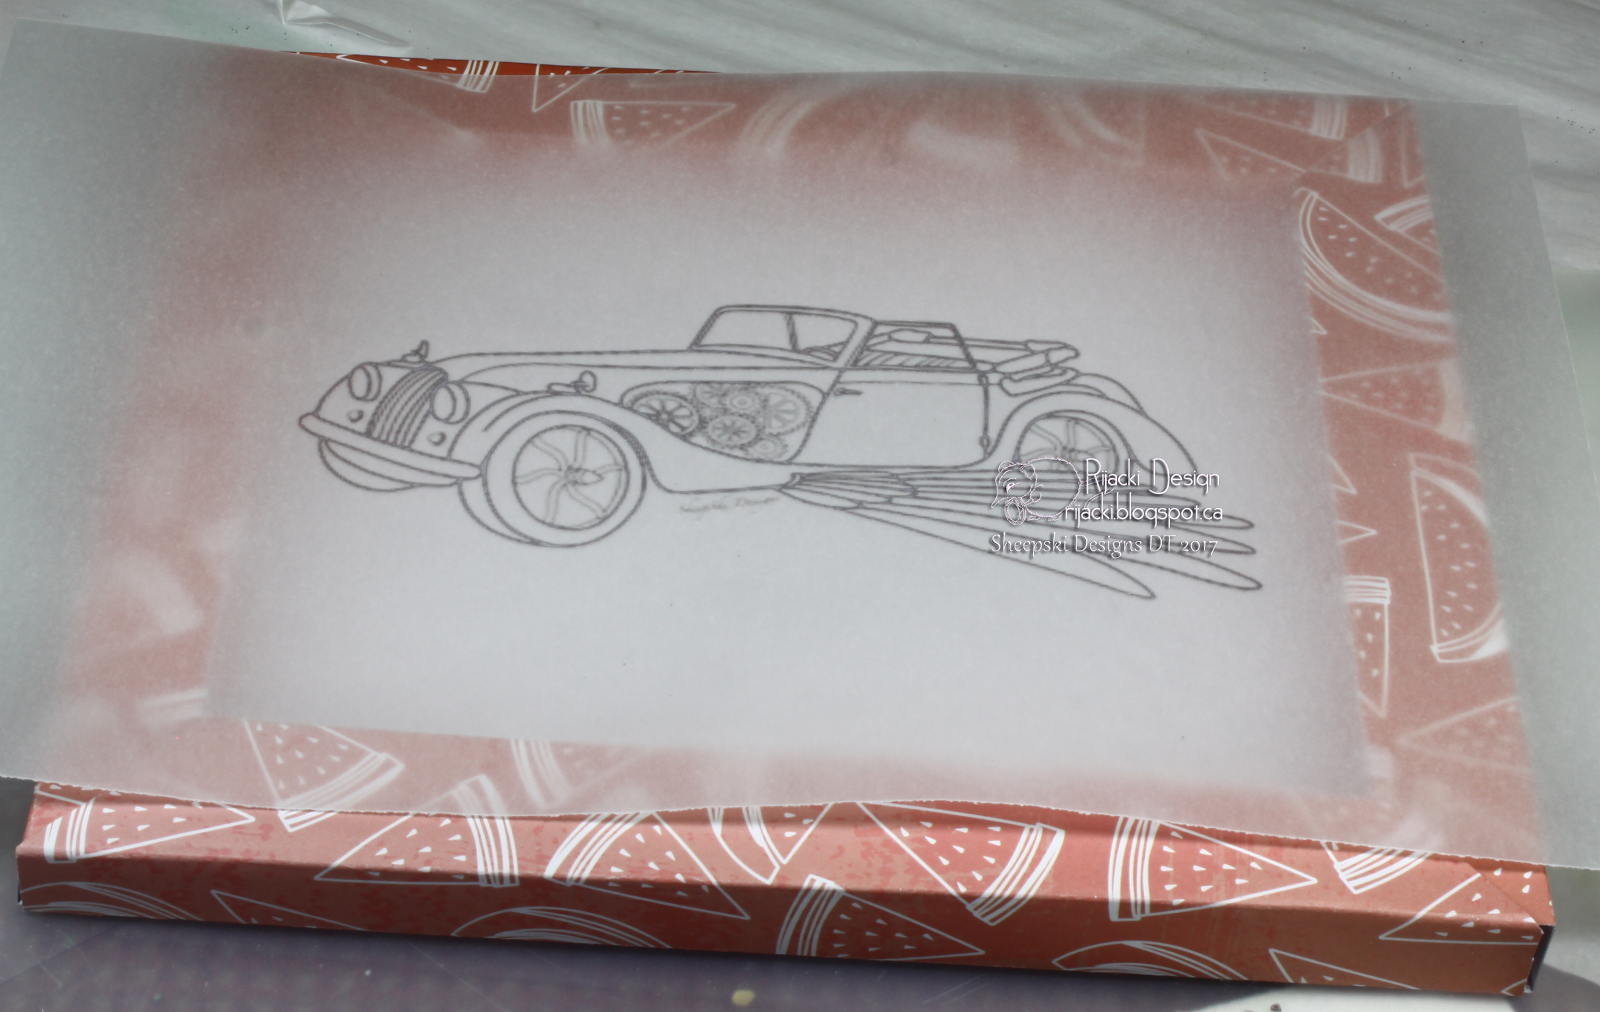
I used the newly released image Bryan's Baby as the focus of my project. The car is an embellished Morgan. Isn't it just wonderful?
Come join us in the challenge! It's anything goes for the month of May. The challenge ends 31 May:
https://sheepski-designs-challenges.blogspot.co.uk/. For the Anything Goes blog challenge, you don't need to use a Sheepski Design image, but we would love it if you do.
You can also play along with the Facebook group challenge, but you need a Sheepski Design image: https://www.facebook.com/groups/1730005463906336/
You can find Sheepski Designs in the etsy shop: https://www.etsy.com/uk/shop/SheepSkiDesigns?ref=hdr_shop_menu
Supplies


Putting It Together
One of my favourite movies growing up was Chitty-Chitty-Bang-Bang. When Andrea showed us the new image she had been working on was a flying car, I immediately thought of the movie from my childhood. It's not identical to the movie car, so I just used that car as inspiration.

Sheepski Designs are digital stamps. When I print out the images, I usually print more than one on a sheet so I use the whole sheet. I chose a couple other Sheepski Designs images to print with Bryan's Baby to use later.

I trim the images and store them in a baggie for a future project. I have a few pending *laugh*

While working on a previous project, I discovered the ink from my printer is sticky enough for a short while that it will hold embossing powder on the thin printed lines to allow for an easy embossing. I tried both black and clear for Byran's Baby but liked the clear better for this project. I'll use the black embossed one another day. It's in my baggie of images now. I embossed the image because the printer ink is more smeary on vellum than it is on paper.

I tried the image in the shadow box I made to figure out the sizing. The shadow box has a 3/4" frame that's 1/2" high. I show the basics of how to make a shadow box in an earlier post: http://rijacki.blogspot.ca/2017/03/bubbles-shadowbox.html.

Sheepski Designs are digital stamps. When I print out the images, I usually print more than one on a sheet so I use the whole sheet. I chose a couple other Sheepski Designs images to print with Bryan's Baby to use later.

I trim the images and store them in a baggie for a future project. I have a few pending *laugh*

While working on a previous project, I discovered the ink from my printer is sticky enough for a short while that it will hold embossing powder on the thin printed lines to allow for an easy embossing. I tried both black and clear for Byran's Baby but liked the clear better for this project. I'll use the black embossed one another day. It's in my baggie of images now. I embossed the image because the printer ink is more smeary on vellum than it is on paper.
I tried the image in the shadow box I made to figure out the sizing. The shadow box has a 3/4" frame that's 1/2" high. I show the basics of how to make a shadow box in an earlier post: http://rijacki.blogspot.ca/2017/03/bubbles-shadowbox.html.

I started painting the image and then decided to dry fit some gears. I tried wood cut gears from Southern Ridge Trading Company and..

.. Tim Holtz gears. The wood ones are smaller and I liked them better.

I finished painting the front side of the image with Distress Ink and Perfect Pearls using waterbrushes.
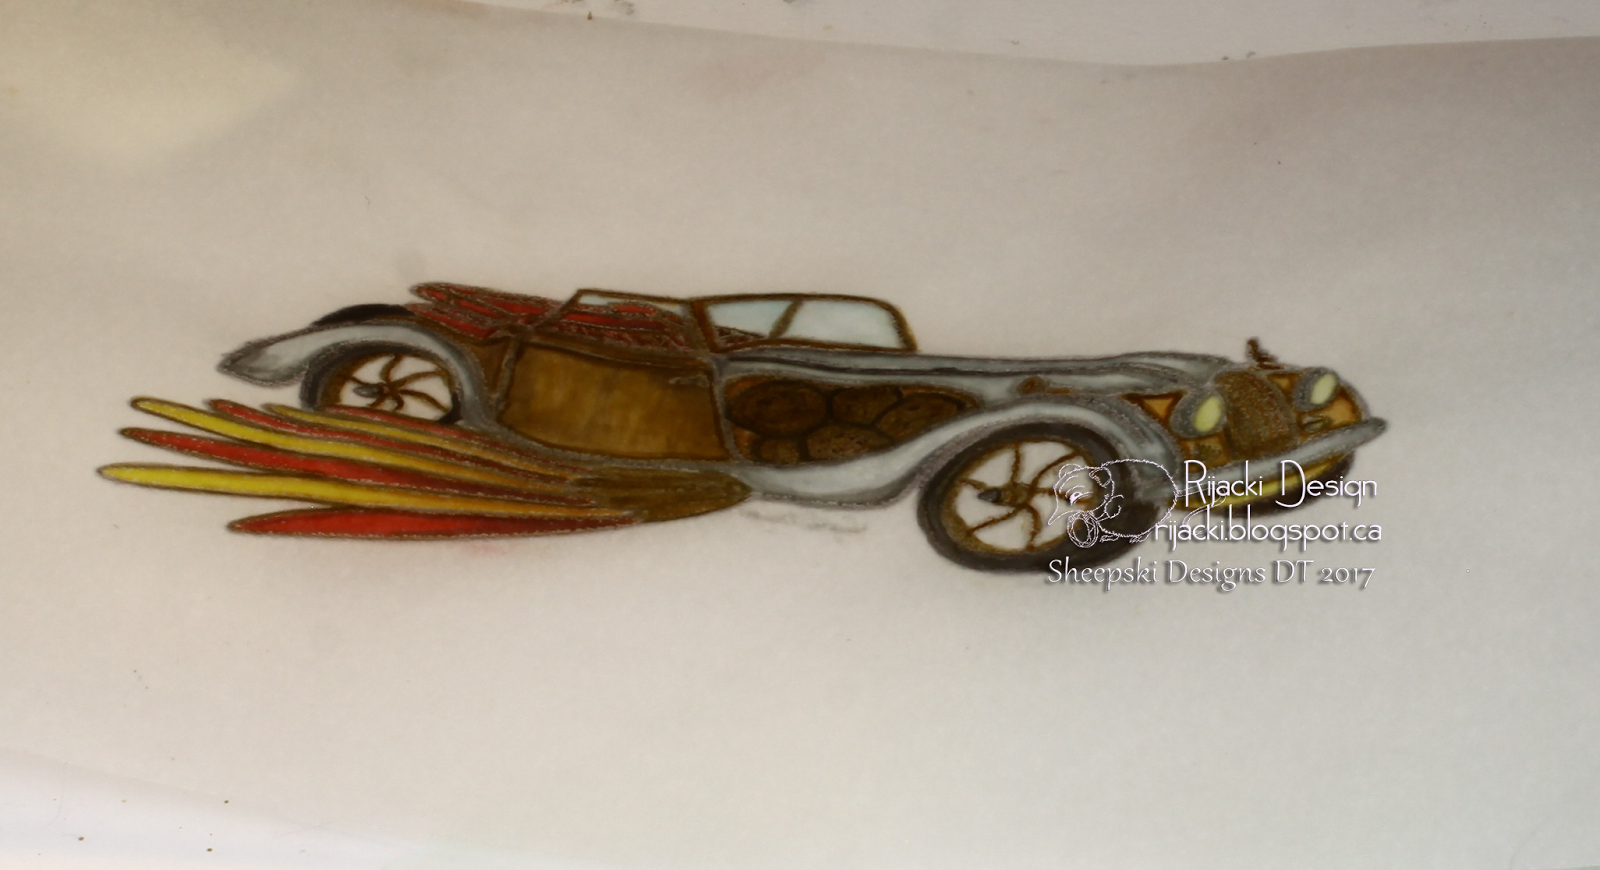
With the image on velum, I could add some colour to the other side to enhance the colouring.

From the front after the back has also been painted.

Using the measurements I worke out earlier, I then created the shadow box with a 12 x 11" sheet of copper foiled cardstock. The sides are 1/2" tall with the frame at 3/4". How to create a shadow box: http://rijacki.blogspot.ca/2017/03/bubbles-shadowbox.html. The scoring on the side is 3/4", 1/2", 3/4", 1/2" instead of 1/2" for each.

Before putting the shadow box together, I dry fit the painted image to make sure the colours looked good together.

The assembled shadow box.

To trim the vellum to the right size, I trimmed a piece of scrap printer paper to the size of the interior space. (I should have made it just a little bit smaller.)

I centred the printer paper panel on the car and scored the vellum on the edges of the paper.

I made a shallow box with the vellum so there would be space behind it in the shadow box for the lights.

I got the lighting from a card kit I picked up last Christmas. It's a string of LEDs with a battery pack that has an on/off toggle switch.

I got the lighting from a card kit I picked up last Christmas. It's a string of LEDs with a battery pack that has an on/off toggle switch.

I used a bead reamer to poke a hole in the corner of the shadow box.

I fed the LED light string through the hole leaving the light control and battery pack to be on the back of the shadow box,

I was so intent on the final assembly, I forgot to take pictures. I used small bits of clear tape to fix the light string to the outside of the interior of the box. I fit the vellum over the light string.

I added gear and cogs to the image and the frame. I added the gears to the frame to cover a small flaw in the lower right corner mitering.

Without the lights on.

With lights on.
Other Challenges I would like to enter for this project
Inspiration Destination: Masculine
Try It On Tuesday: Transport
Scor-Pal: Favourite Colour Combination
Penny's Paper-crafty: Anything Goes
Simon Says Stamp Wednesday challenge: Anything Goes
Crafty Gals Corner: Anything Goes
Crafty Friends: Anything Goes
Vilda Stamps: Anything Goes
A Bit More Time to Craft: Anything Goes
Crafting From the Heart: Anything Goes
Love to Scrap: Anything Goes
Beautiful creation, I love the added details on the frame and the lights. Thanks for sharing your creation with us at Crafty Friends, we hope to see you back again.
ReplyDeleteThis is amazing! So glad that you shared it with us. Thanks for joining us this month at Scor-Pal!!!
ReplyDeleteHello…. WOW.. You have made a beautiful project… enjoyed reading your tutorial. Thanks for entering it into the ‘Anything Goes’ challenge at Crafty Friends Challenge Blog. Good luck in the draw and we would love you to join us again for our next challenge.
ReplyDelete[Diane Louise, Team Leader for Crafty Friends Challenge Blog]
This is a such a beautiful piece, your flying car is amazing and the cogs and wheel embellishments look wonderful! I enjoyed seeing how you created it and the materials you used too :-) . Nice to meet you at Try it on Tuesday and wishing you a great week! J :-)
ReplyDeleteSuch a great project! Love how you have embelished the frame. Thanks for joining us this month at LTSCB!
ReplyDeleteBeautiful! I love vintage. It is my theme on my birthday bash link up.
ReplyDelete♥ Monica
Be sure to check out the link up party with lots of prizes!
My personal Blog - Taylormadecards4u
Its an awesome project and it was a wonderful way to frame the car. Thank you for sharing it with us over at TioT'a this time.
ReplyDeleteYvonne
What an amazing demonstration of your beautiful work. This is a fantastically covered image on vellum. I am in awe! Thanks for sharing your talent over at Penny's Paper-Crafty Challenge!
ReplyDeleteThis is so wonderful work. Thank you for joining us at TioT.
ReplyDeleteWhat an awesome creation...thanks for the step by step development.
ReplyDeleteThank you for joining us at Vilda Stamps Challenge Blog.
xxx Margreet
What a beautiful project linked to Try It On Tuesday! Thank you very much for participating!
ReplyDeleteoxo Susi
Unique project. Congratulation.
ReplyDeleteMarjeta
Great design. Thank you for joining in The Crafting From the Heart challenge.
ReplyDeleteMary.
Wow, I Love all the layers you added, and the lights are so cool! Thank you for joining our Challenge over on the Vilda Stamps Challenge Blog! DT Mindy
ReplyDeleteWhat a super sweet project you have for us today, so well thought out and put together a fabulous Creation Beautiful in every way, we are so lucky you have entered our VILDA STAMPS challenge blog
ReplyDeleteso beautiful to look at good luck hugs Tracy x
Terrific project, Rijacki!
ReplyDeleteWhat for a great idea and thanks for showing like a tutorial... Beautiful in every way, we are so lucky you have entered our VILDA STAMPS challenge blog
ReplyDeleteso beautiful to look at good luck hugs Ute
Awesome project! Thank you for joining our Scor-Pal Challenge this month.
ReplyDeleteRuza
Ruza's Craft Corner
Oh my goodness, we hit the jackpot today, with all these beautiful project idea and instructions! Thank you so much for participating in our 'More than one fold' challenge at Scor-Pal!
ReplyDelete