

On Monday I found out the challenge for SSS blog was "Wish". Immediately, the song from Cinderella started drifting through my head. I started mentally going though various things in my collection of dies and stuff to build the idea.
Supplies


Putting It Together
I started collecting dies not long after I got my BigShot just last November (not even a full year yet!). I've been getting what strikes my fancy, usually from what's on sale, without a specific project in mind. I do that with a lot of stuff, actually. It's part of why I have a hoarde.. err collection of things because I am such a magpie *laugh*
This piece has a bit of a story line. I wanted to use elements from the Cinderella story: dress making, fairy godmother, pumpkin carriage, and the castle (two Spellbinders die sets: Pretty Princess and . I wanted to use my Memory Box cloudy dream die and Spellbinders Victorian letters, but needed a way to convey the rest of the words. And then I thought of the Hero Art's Fanciful Swirl Alphabet in my stash and a heart for the word (I have a few handy that I've made from resin).

I do a lot of dry fitting as I put together an idea to help me see if anything else might be needed. This project was no different. I dry fit together the various dies, stamps and other items I thought I would want to include. In the beginning, I was thinking of doing the project as a card, so was thinking in card dimensions.

After I cut out the various pieces and dry fit them, I decided the Spellbinders Gothic Strip looked better on the side. At this moment I thought about some canvas board I have. While laying out, I also realised I need a vine to convey the pumpkin of the carriage, more than just the colour, and pulled in the Sizzix flourishes.

I had some canvas board in my stash that I got from a dollar store. For the Supplies list I linked something similar from Michaels (but at more than double the cost). I did another dry fit and, as you can see, changed the heart.

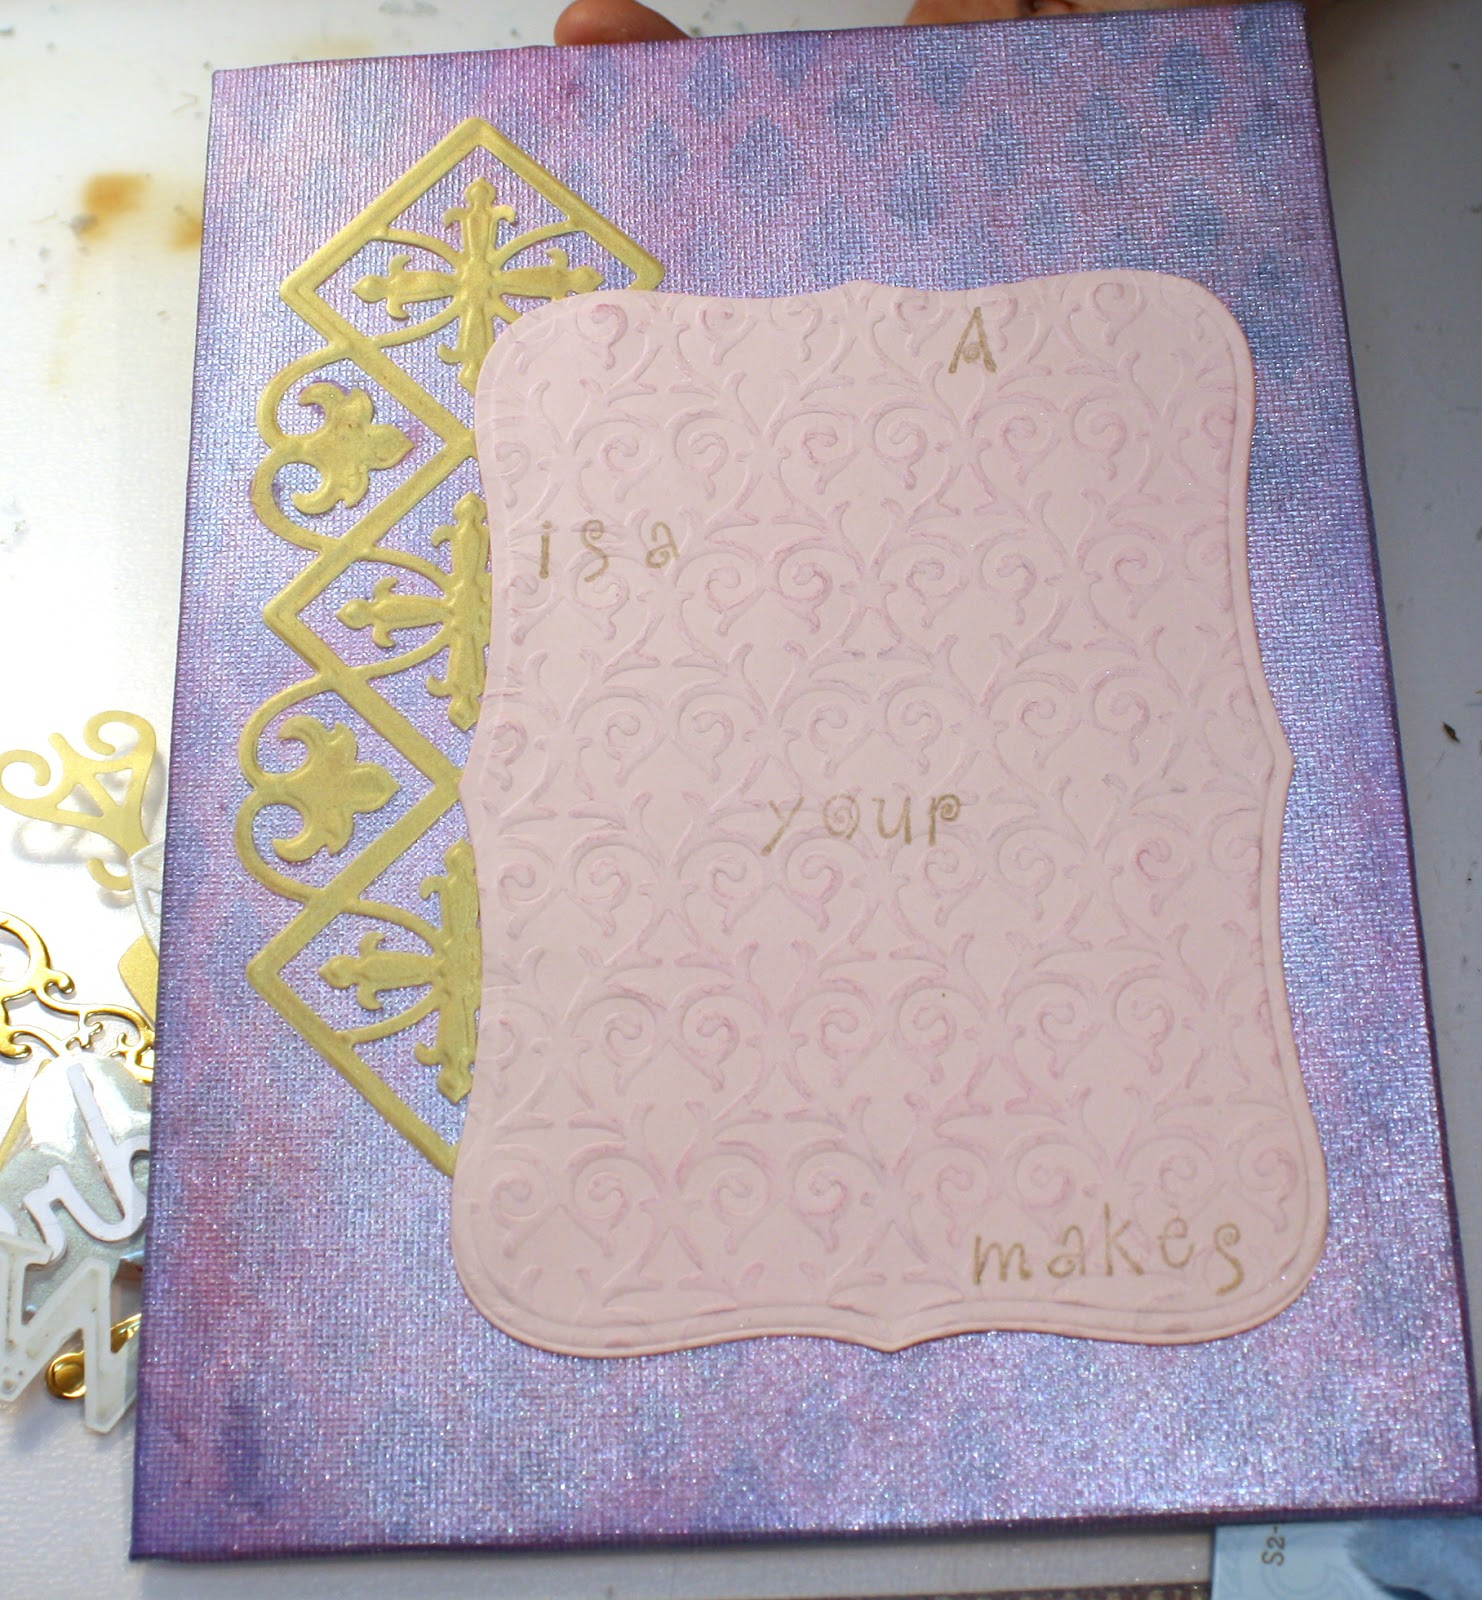
The paper panel under the storyline is pale pink paper embossed with Elizabeth Craft Designs Hearts Entwined to give it a romantic underlay. The panel was then cut with a Spellbinders rectangle die. I lightly went over it with Picked Raspberry Distress Ink. I dry fit the other elements again to determine the locations of the joining text to stamp it with Colorbox gold.

I used Picked Raspberry to colour the canvas board.

I used a stencil and Salty Ocean, pouncing the ink with the blender.

The stencil (6x6") wasn't large enough to cover the full canvas, so I moved it down and kind of matched the diamonds to continue.

The canvas board is starting to look more magical but nothing sparkly.

I added Grape Fizz Perfect Pearls and water. Distress Ink works differently on the canvas board. It soaks in more and is less affected by water. More sparkly but a lot darker than I want.

I brushed on Confetti White and lightly misted the background with Grape Fizz water.

Ta-da, a magical background.

Dry fitting time again!
I decided I need some dimension for certain elements, the castle, dream, and the carriage. I also decided the black of the dressmaker dummy is too dark and over powering.

I cut the dummy from the same Iridescent Translucent gold as the gothic strip and wand. To add dimension I cut additional castles and carriages from brown value cardstock and dream from white.

Using Tombow Mono Multi, I glued the pieces together with the deco piece on top.

This makes the piece solid with a bit of dimension.

For Dream, I only wanted the words to be raised with the cloud floating at the height of the top level. The dream cloud is cut from the Iridescent Translucent paper and I didn't want to lose the translucent aspect. I used the Xyron to put adhesive over the entire back of both the cloud and the dream. I cut a small piece of thin clear acetate from packaging. This let me adhere the die cut pieces together without adhesive showing through the translucence.

I fussy cut the clear plastic to match the edge of the dream cloud.

I glued together the white dream cuts with the Mono Multi and affixed them to the back.
Ready to start laying out.

I marked the canvas with the location of the middle of the gothic strip where the mark would be under the pink panel.

I put a thin line of Mono Multi on the back...

.. and laid the strip in place using the marking I put down earlier. I burnished it down to the canvas.
I added the pink panel on top, affixing it with Mono Multi.

I ran the smaller pieces through the Xyron to make it easier to work with them.

I affixed the castle and dream with Mono Multi. I laid down a piece of scrap paper with removable tape to have a straight edge to place the letters of wish.

One of the advantages of the Xyron adhesive is that it can be moved until it is burnished down. I used that property to allow me to weave the flourish, like a vine, around the letters and the carriage.
I, once again, was absorbed in working out the placements and forgot to take process pictures after this point. I re-stamped the 'r' because I covered it with the vine. I then went over it with a silver gel pen that I've had for years. I don't have a gold gel pen at this time or I would have used that. While I had the silver pen out, I added some highlights to the carriage.
I changed out the heart, again, and used one which I had made from Super Clear resin and Pearl Ex. I tied it with a nylon cord bow and affixed it with a glue dot.
For more magical sparkle, I added crystals from Recollections and pearls from Stampin' Up. I also added a shoe cut from a scrap of the Iridescent Translucent paper.

This project looks pretty good on a black easel and has found a home, for now, on our mantle.

Challenges
Simon Say Stamp blog 23 May Monday challenge: Make a Wish
Things I learned
- Distress Ink works differently on canvas board, possibly because of the gesso.
- I need a gold pen.
- It would be nice to have more letter stamps.
- I should do more canvas works.
There is a lot of details to watch! I like the Perfect Pearls background. Thank you for joining us over Simon Says Stamp Monday Challenge.
ReplyDeleteThank you
Delete