

There are three inspirations for this card. The Kraftin' Kimmie Blog Saturday Challenge for 9 April is "Pink!", the Simon Says Stamp Wednesday Challenge is "Happy Birthday", and a dear friend of mine just had a birthday, so this will be a belated birthday card for her. Her favourite colour is, you guessed it, pink.
Supplies:
Chameleon pens: http://www.chameleonpens.com/
Zig Wink of Stella Clear: http://goo.gl/A9gTnN
Colorbox black pigment ink: https://goo.gl/4k5QTQ
Tim Holtz Distress ink mini bundle #1, #2, #3: http://goo.gl/zSS2re
Ranger mini misters: https://goo.gl/Mua2Mu
Tim Holtz mini ink blending tool: http://goo.gl/q3pDhM
Ranger Perfect Pearls confetti white: https://goo.gl/nriwy9
Sakura white opaque glaze gel pen: https://goo.gl/PulKHv
Versamark embossing ink: https://goo.gl/trlHx5
Recollections clear embossing powder: Michaels
Kaisercraft Hopscotch 6x6" pad
Recollections 65lb cardstock: Michaels
Hot Off the Press Vellum Swirls: http://goo.gl/aJDWm5
Tonic Studios butterfly square: http://goo.gl/2EVHy3
Graphic 45 "Time to Celebrate #2" stamp set: https://goo.gl/mhktB9
Inkadinkado expressions and frames stamp set: http://goo.gl/DfcMqV
Little B thin silver harlequin washi tape: http://goo.gl/mk8RL0
Tombow adhesive: http://goo.gl/XMLQG6Hot Off the Press Vellum Swirls: http://goo.gl/aJDWm5
Tonic Studios butterfly square: http://goo.gl/2EVHy3
Graphic 45 "Time to Celebrate #2" stamp set: https://goo.gl/mhktB9
Inkadinkado expressions and frames stamp set: http://goo.gl/DfcMqV
Little B thin silver harlequin washi tape: http://goo.gl/mk8RL0
Ranger Multi-media Matte: http://goo.gl/Twfcs3
Recollections mounting foam dots: Michaels
Fiskars 12-inch Paper Trimmer: http://goo.gl/1C80jr
Tim Holtz Snips: http://goo.gl/nJYJeS
Sizzix Big Shot die cutter: http://goo.gl/a6dqtw
Sizzix precision base plate: https://goo.gl/zx1odC
Sizzix brush and foam pad: https://goo.gl/43ilg2
Sizzix Texturz impression pad: https://goo.gl/TkkjJL
Sizzix Texturz silicone rubber accessory: https://goo.gl/AsjuRO
Recollections heat tool: Michaels
My supply list got to be impressively long on this one!
I started this card playing around with the Tonic Studios butterfly square die. I had first cut it in black thinking to float another colour beneath it and layer a square on top. I still don't have a set of square dies so would have had to just cut one. But.. then I was thinking about pink and cut the butterfly square in pink.
The die has some rather small cut areas and needs a precision cut plate. Good thing I got one not long ago.

The die has some rather small cut areas and needs a precision cut plate. Good thing I got one not long ago.

The precision plate goes in place of the bottom cut acrylic cut plate. It's a heavy stiff metal with a powder coated side. The directions go down with the powder coated side up. The paper goes next with the die cut side down.

Run through the BigShot then turn and rub through again to make sure all the cutting edges get hit well by the rollers.

After running it through twice, the easiest way to get all the little pieces released is to use a brush tool.
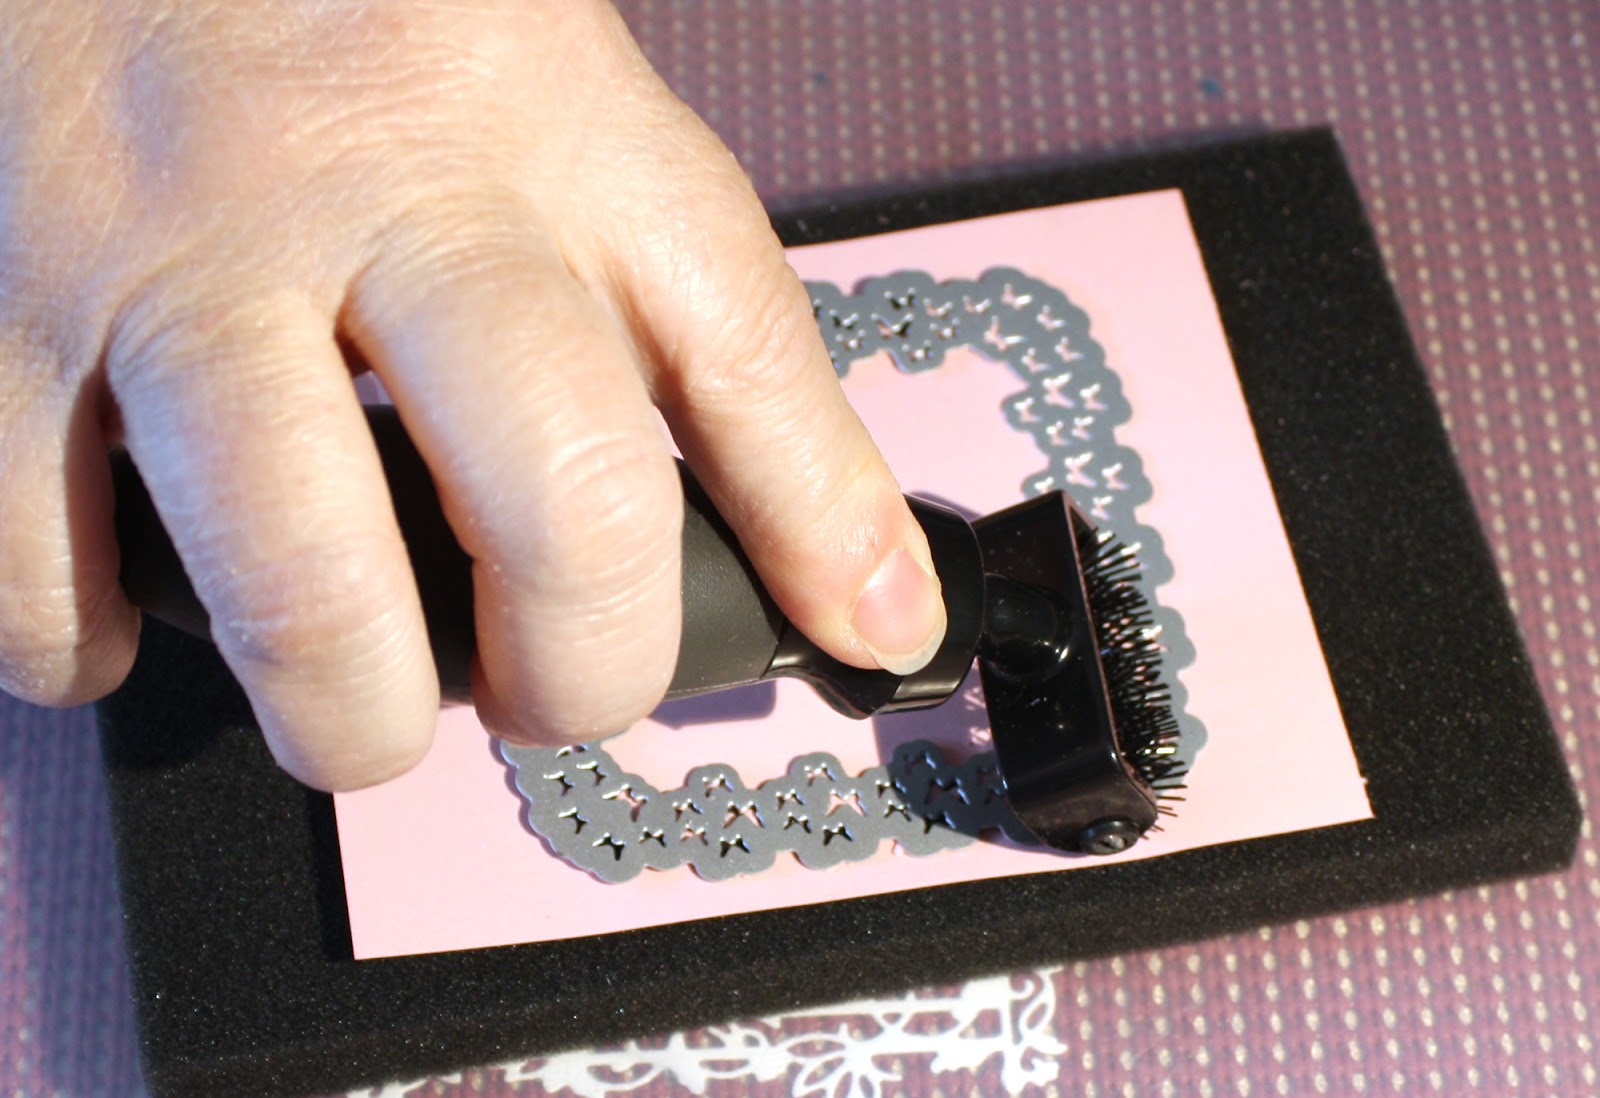
After brushing vigourously all around, lift away the die. The cut piece will likely still stay attached to the die but all the little pieces will stay on the foam pad.

Brush these either in to the trash or, better yet, into a container to use as confetti later for a shaker card.

To release the cutting, I used a bead reamer since I don't have a papercrafting pick. I started from the top centre, carefully working the pick in between the die and the paper.

Once I had the first corner released, I could run the pick between the die and paper from the back...

... until I got it fully removed from the die.

I wish this die had a cut edge in the middle. I need to get a nested rounded square die set to fit into my budget.
Seeing how the black looked through the pink, I decided to make an embossed version of the butterfly square in black to layer behind the pink. To use the Texturz to emboss rather than cut the die, the die is placed cut side up with the paper over it and then the silicone rubber pad with the plastic pad on top.

And run through the BigShot.

Then dry fit the them to see how it looked.

I fussy cut around the embossed image, using the impression edge as the cutting guide and then adhered the pink to the black with Multi-medium matte and Tombow runner in the centre.

The butterfly square, pink and black:

Since this is a birthday card, I wanted to use a birthday cake. I already knew the cake stamping would fit in the open space of the butterfly square because I did a dry fit by placing the uninked stamp in the space. But, I decided I wanted it 'popped up' from the background. Thus, more fussy cutting for me.
First though I debated between just a black and white cake or colouring. I stamped with Colorbox black pigment ink...

... then covered with clear embossing powder.

Using a coffee filter with embossing powder makes it easier to pour the remainder back into the jar after tapping off the excess from the image.

Handy dandy heat tool to melt the powder. I need a better heat tool. This one from Michaels works for now but I really want a better quality one. This one over heats too easily. Higher heat means faster melting and less paper warping.

Clear embossing over black makes it a resist for other colours layered over. The black won't be as muted in the end.
I wanted to colour the cake pink-ish with the flame yellows and the base, at this point I wasn't sure what to do on the base but I didn't want it the same colour as the cake. I used Post-It notes for masking.

Using a blending tool and Distress inks (picked raspberry and antique linen), I added colour to the cake. I should have done linen first then raspberry then linen again. I got the raspberry a bit strong. I have limited Distress inks at this time or I might have chosen different colours to use.

After I was mostly satisfied with the cake colour, I misted it lightly to let the Distress inks work more magic.

And then I took off the masking.

I added spiced marmalade, fired brick, and mustard seed to the flames and antique linen to the base. If I were to do this again, I would leave the base as is without colouring.

To add accents to the flowers at the base of the cake, I used Cameleon markers, green (GR3) and pink (PK3).

And then I fussy cut the cake.

After fussy cutting the cake, I used the pink Chameleon marker to go over the candles, orange Chameleon marker to strengthen the flame, and then added some white touches to the top of the cake with the gel pen. I also added Wink of Stella and Glossy Accents to the base.
After colouring the cake, the 'raw' paper of the butterfly square looked a bit flat, especially next to the cake. So, I used the antique linen and picked raspberry on the butterfly square.

I then had the bright idea it would look good with a bit of shine. In another mini mister, I mixed in some confetti white Perfect Pearls. The final result was perfect.

I dry fit the cake on the butterfly square and like how it looks. Not a lot of contrast, but enough. Especially since I planned to put dimensionals under the cake.

After finding the background paper I wanted to use (and going through my choices again since I changed the colour of the square), I dry fit everything.

Putting it together, I first adhered the dark pink background to the black with tape runner.

Then I adhered that panel to the base card, the wrong direction at first, of course. This will not do for a top fold card.

Thankfully I could lift the panel and turn it to the right direction. I would have been real embarrassed if I had put it upside down as the second move.

I had die cut 'Happy Birthday" and was intending to use it all the way to this point, but got here and thought it powered everything too much. I had even sprayed the black die cut with Perfect Pearls to give it some shine and cut foam versions to have the portion off the square at the same height as the portion on. Oh well, saved for another day, another card.
Instead, I decided on a double 'banner' with sentiment. I went through my stamps until I found the "Happy Birthday" I felt matched the cake better, but then had to decide how I wanted it. I tried a few embossing powders and then went with simple black ink with clear embossing to give the lettering a little dimension.

I used thin washi tape to hold the edges of the vellum so there wouldn't be any adhesive showing through the transparency. I ended up adding a little Multi-medium matte under the outside edge, too, since the card does step down in height from the dark pink background to the black to the white card base. The thin washi with silver diamonds really sets off the vellum nicely though I now wish I had it in gold, too. The double flag is flat on the butterfly square and dimensioned on the vellum with the same foam tape that's under the square.

Simon Says Stamp Wednesday 6 April - "Happy Birthday": http://www.simonsaysstampblog.com/wednesdaychallenge/simon-says-happy-birthday-4/
Kraftin' Kimmie Stamps Block Saturday 9 April - "Show Us Your Pink!": http://kraftinkimmiestamps.blogspot.ca/2016/04/challenge-326-show-us-your-pink.html
Additionally, for KKS, the April sketch inspired the layout:

I'm really enjoying seeing how I can complete and/or combine a challenge. I wish I had even more time to both craft and blog about it. Part of my blogging about it is part of my self-teaching, too. I think about what I've done and how I did it and how I could do it better on the next project.
This card is being sent to my friend tomorrow. I hope she likes it. It will arrive belated for her birthday which was a day or two ago, but it should still brighten her day, I hope.


Beautiful card!! Thanks for joining our Pink challenge this week with Kraftin Kimmie Stamps.
ReplyDeleteMarilyn DT
Gorgeous card Rijacki, I love the butterfly die, it looks fabulous with the black background! the whole design is absolutely fabulous and I loved the step by step instructions too :-)
ReplyDeletethanks for joining us on the Simon Says Stamp Wednesday Challenge
luv
Lols x x x
What a great birthday card! I bet your friend loved it. :)
ReplyDeleteThank you for stopping by my blog and leaving the sweet comment. I am happily your newest follower!