

Triple matted card with skulls. The skulls and cover sentiment are embossed with Glow in the Dark. Spooooky. Halloween, resistance is futile.

With the lights off, the card has a spooooky glow.

Challenges
Simon Says Stamp Wednesday challenge: Totally Resistable
Craft Your Passion: Anything Goes
Addicted to Stamps and More: Anything Goes
Krafting Kimmie Stamps Saturday challenge: Anything Goes
Crafting From the Heart: Anything Goes
Aurora Wings: Anything Goes
Try It on Tuesday: Scary and Spooky
Crafty Cardmakers: Things that Go Bump in the Night
Southern Girls: Punches and Dies
Just for Fun Rubber Stamps: Halloween
Crafty Cardmakers: Things that Go Bump in the Night
Southern Girls: Punches and Dies
Just for Fun Rubber Stamps: Halloween
Addicted to Stamps and More: Anything Goes
Krafting Kimmie Stamps Saturday challenge: Anything Goes
Crafting From the Heart: Anything Goes
Aurora Wings: Anything Goes
Supplies


Putting It Together
I like the look of multiple matted cards and a card using embossing paste resist is perfect for this style.

To start, I stamped and embossed skulls on a panel. The embossing powder is Glow in the Dark to give a spooky look. It's not easy to see the slightly yellow embossed images on the white cardstock, so...

...I used the blending tool and Black Soot Distress Ink to darken the panel. The embossing acts as a resist for the ink, leaving those areas the colour of the card and embossing. After adding the ink, I used a dry cloth to buff the embossed skull and remove the sheen of ink from the embossing. This also brightens up the skulls, too.

I ran the skull panel through with the stitched rectangle die to make 3 cut panels. I used every other die size. I found the orange glitter silk card in my stash, perfect.

I used the same dies, the in-between sizes to cut the orange and dry fit the panels together.

To prepare the card base, I used the same Black Soot ink to darken the inside and front to give the rest of a card a spooky look.

I glued to largest two panels together, and then...

...attached them directly to the card base.

I glued the next two sizes together and added foam mounting tape to have the panel higher than the base.

And added to the card. I lined up the skulls.

I affixed the smallest panels together and added foam mounting tape. To help keep the centre from being crushed, I put in a double stack of the foam tape.

And the multi mounting is done.

I embossed vellum with the same Glow in the Dark powder.

I trimmed the sentiment to a double flagged banner. The nice thing about vellum, it takes shaping so well.

I balled up half a dot of Glue Dot Craft dot to place at each side of the banner. To obscure the adhesive, I put down a dot of Onyx Liquid Pearls.

I added a sentiment to the inside placed in the area intentionally left a bit lighter.

I added a confetti spider to the empty spot in the top panel.

And, in the dark...


To start, I stamped and embossed skulls on a panel. The embossing powder is Glow in the Dark to give a spooky look. It's not easy to see the slightly yellow embossed images on the white cardstock, so...

...I used the blending tool and Black Soot Distress Ink to darken the panel. The embossing acts as a resist for the ink, leaving those areas the colour of the card and embossing. After adding the ink, I used a dry cloth to buff the embossed skull and remove the sheen of ink from the embossing. This also brightens up the skulls, too.

I ran the skull panel through with the stitched rectangle die to make 3 cut panels. I used every other die size. I found the orange glitter silk card in my stash, perfect.

I used the same dies, the in-between sizes to cut the orange and dry fit the panels together.

To prepare the card base, I used the same Black Soot ink to darken the inside and front to give the rest of a card a spooky look.

I glued to largest two panels together, and then...

...attached them directly to the card base.


And added to the card. I lined up the skulls.

I affixed the smallest panels together and added foam mounting tape. To help keep the centre from being crushed, I put in a double stack of the foam tape.

And the multi mounting is done.

I embossed vellum with the same Glow in the Dark powder.

I trimmed the sentiment to a double flagged banner. The nice thing about vellum, it takes shaping so well.

I balled up half a dot of Glue Dot Craft dot to place at each side of the banner. To obscure the adhesive, I put down a dot of Onyx Liquid Pearls.
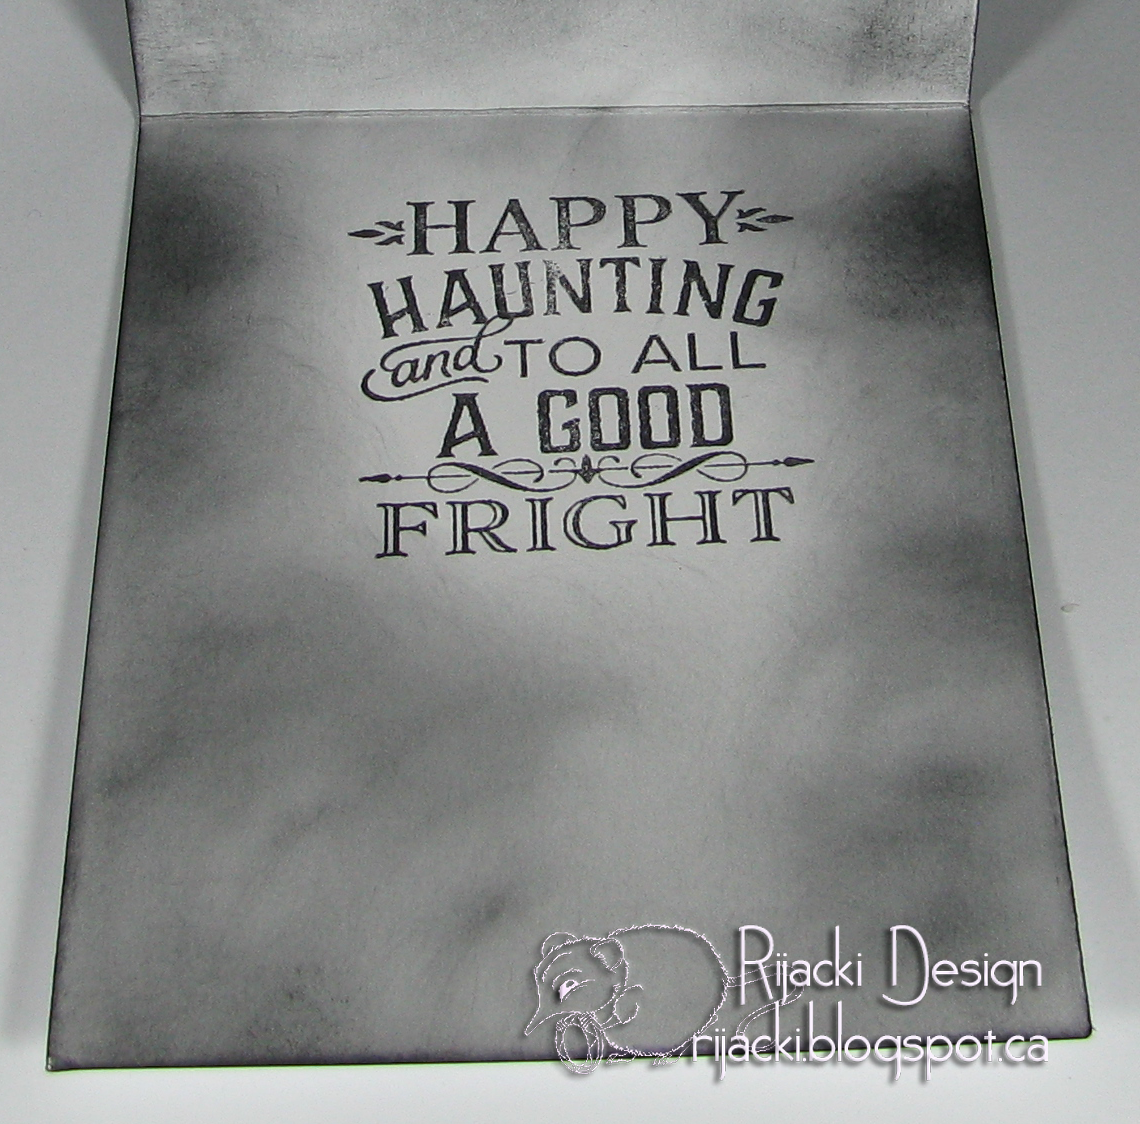
I added a sentiment to the inside placed in the area intentionally left a bit lighter.

I added a confetti spider to the empty spot in the top panel.

And, in the dark...

Fabulous scary Halloween card.
ReplyDeleteThank you for joining us at Simon says Stamp Wednesday Challenge.
Luv
Debby
The glow in the dark feature is really fun! Great Halloween card and thanks for sharing with us at Just for Fun Rubber Stamps!
ReplyDelete~~Heidi @ My Little Stamping Blog
JFF Design Team
Gorgeous card, stylih and the glow in the dark is extra effect.
ReplyDeleteThank you for sharing with us at TioT.
A fantastic idea and very well made
ReplyDeleteThank you for joining us at Try it on Tuesday
Love Chrissie xx
Fantastic ! Thank you for joining TioT's!
ReplyDeleteBrilliant card, very spooky, and a great step by step too! Thanks for playing along with the Southern Girls.
ReplyDeleteChris
x
What great sentiment - the perfect finishing touch to your card!
ReplyDeleteThanks for joining us at Crafty Cardmakers!
Thank you for sharing your fantastic Spooky Halloween card with us at TioT's.
ReplyDeleteYvonne
Great Hallowween card, Rijacki. Thanks for joining us at Craft Your Passion Challenges! - Patti (CYP DT)
ReplyDeleteI love your spooky card. The glow in the dark ep effect! it even shows up well in a picture! Thanks for doing the Just For Fun challenge. We hope to see you back soon.
ReplyDeleteSo many great details I love about your card: the use of frames in such a clever way, the glow in the dark effect and those sentiments are awesome ;o) Thank you for joining our „Things that go bump in the night“ challenge over at the Crafty Cardmakers ;o) Happy crafting,
ReplyDeleteMaike
Great card. Lovely details. Thank you for joining us at Crafty Cardmakers this week. Hope to see your lovely artwork here again soon. Judy DT
ReplyDeleteFabulous card! I love how you layered it. Thank you for joining us at Craft Your Passion. We would love to see you again!
ReplyDelete~ Bonnie DT
Awesome card and stunning tutorial...Thank you for joining us at ATSM
ReplyDeleteŽeljka DT
such a great Halloween project - love the glow-in-the-dark-effect - I hope you join us again at Addicted to Satmps and More
ReplyDeleteGreat Halloween card. Thank you for the tutorial. Thank you for joining us at Crafty Cardmakers this month. Hope to see you back here again soon. Judy DT
ReplyDeleteSuper cool card and I love that it glows. However, we require a hand colored image (not just stamped) at Aurora Wings so I'm afraid it must be removed in fairness to all. I'm so sorry because it's a fab creation. Hope you understand. xxD
ReplyDeleteTotally understandable. I'm sorry I missed that detail in the rules. Thank you so much for your great comments, too! I hope you like my Pumpkin Light as much and, since it's very painted/coloured, it should be within the rules. too. :)
DeleteI just love everything about this card! The sentiment is awesome!
ReplyDelete