Nothing more fun to do at the beach than to build a castle and get sand between your toes. This project uses 5 different stamp sets! and Distress Ink watercolour painting. I love painting with Distress Ink, the colours are so vibrant and the ink is a very lovely paint.
For this card, I fished the inside panel as well.
Supplies
This project uses 2 different masking techniques and a lot of water colouring to combine 5 different stamp sets into one cohesive card. I also used newly purchased Memento ink colours. I got them because I want to try work at perfecting edgeless colouring, but their colours were perfect for this project, too.
This project started with a notion to join a couple of Kraftin' Kimmie Stamps sets into a scene, the sand castle building Lucas from the Sun-sational set and the background At the Beach.
I dry fir the two stamps to get an idea of their placement. Since I wanted to overlap the stamps and also wanted them on a single plane, one canvas, and not separate images, I needed to use masking. When stamping, you have to start with the top most image and work your way down.
I stamped the boy building his sand castle twice, once on to the watercolour cardstock and a second on scrap paper. I fussy cut the scrap paper where it would be over lapped by the background.
I laid the mask over the stamping and used a bit of removable tape at the bottom to keep it in place.
I stamped the background over top of the mask.
Before removing the mask, you can see how both images are stamped together.
After removing the masking (this was the second time I stamped the scene), close to the first stamping that was masked, the second stamping was missing a small amount of lines (due to the thickness of the scrap I used for the mask). I used a black pen to 'fix' the lines.
I started my painting with the sand and the lightest colour on the bushes. I then set it aside for a few days while I completed a different project. Distress Inks used are noted with the finished panel below.
After looking at the scene a couple days and thinking about it, I decided I wanted to add in a critter. I decided to bring in the little dog from Made With Love (a stamp set that also features Lucas, but in a baker's outfit). To add just the dog from the stamp, I masked off the other parts of the stamp around the dog. I inked up the stamp then removed the masking before stamping into the scene.
Because I had already painted the sand, I planned to paint the dog a darker brown.
To transform the cookie in the dog's mouth to something more fitting for a beach scene, I coloured the 'cookie' red and added white dots with a gel pen to make it look more like a deflated ball or frisbee than a cookie.
- Boy's skin: Worn Lipstick, Spun Sugar, Rusty Hinge, Antique Linen
- Boy's hair: Wild Honey, Scattered Straw
- Boy's shorts: Dusty Concord, Faded Jeans
- Sand: Old Paper, Rusty Hinge, Vintage Photo
- Rocks: Pumice Stone, Vintage Photo
- Bushes/Trees: Evergreen Bough, Peeled Paint, Mowed Lawn, Forest Moss, Crushed Olive
- Sky: Tumbled Glass
- Sea: Broken China, Salty Ocean, Peacock Feathers
- Dog: Vintage Photo, Walnut Stain, Barn Door,
- Toys: Barn Door, Dusty Concord, Mustard Seed, Fired Brick, Forest Moss, Evergreen Bough
I've been steadily increasing my collection of Distress Inks. The colours are fabulous and work with a waterbrush so very well.
After finishing the scene, I wanted to crop it using a square die for a crisp, precise cut. I have 2 square die sets, one from Elizabeth Craft Designs with stitch and dots on alternating sizes and a matting set from Spellbinders. I dry fit some dies over the scene using the opening to frame the scene to get an idea how it would look. I tried the ECD and liked the look of the smaller size (a bit more than 4" x 4"), cutting off some of the trees in a tighter scene, but didn't think the stitch line worked for this scene. I tried two sizes of the Spellbinders set of approximately the same sizes I had tried with the ECD set and decided on the smaller matting die.
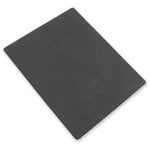
To get the matting, once the die has been run through to cut, it needs to be run through again with the Texturz impressions pad and silicone pad to push the paper into the die.
I decided I did want a sliver of colour around the picture and waffled between dark red and dark blue. I dry fit the panel on both.
I decided for the blue since the background frame would have more red and I wanted the scene to be more distinct from it. I adhered the watercolour panel to the blue with a sliver of the colour showing.
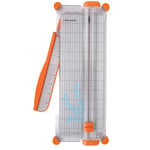
Using the wire guide on the Fiskars trimmer, I sliced the other two sides with the same sliver of colour.
The sliver of colour gives a nice finish.
Until Saturday morning, I wasn't sure what I was going to do to finish the card, but the KKS blog's challenge of a stamped background gave me an idea. I cut a 6" x 6" panel of Stampin' Up Natural White (retired) and drew a square in the centre that would be covered by the scene panel to give me an idea of the visible area. I used the shells stamp from Summer Lovin' set and created a background with the 4 colours in the Memento Arizona Canyon dew drop set which I had purchased just a couple days prior.
I added a yellow pineapple from KKS Fancy Flamingos set with yellow (not linked in the supplies), but, while dry fitting the watercolour panel decided I didn't like it.
So, I redid the shell panel.
Dry fitting the watercolour panel, I was well on my way to finishing.
Do determine if I needed more, I dry fit everything on the craft cardstock card base I decided to use along with the sentiment stamp (from the Sandy Toes set).
I decided to use the same square matting die to cut the shell panel, using the largest one in the set. I also cut a label panel from another die set, the smallest of the set, for the sentiment and dry fit again.
I decided the shell panel needed something more so, like the scene panel, I added a very thin coloured matte. For this panel I used the red I didn't use for the other one. I then adhered this panel directly to the card base.
I used foam mounting tape on the scene panel to give it dimension.
I put the sentiment in the upper corner popping it up as well with foam mounting tape.
For the interior, using the Natural White card stock, also cut with the matte square die once again, I stamped the sand castle from Summer Lovin' and another sentiment from Sandy Toes. I added a colour matte to finish it up.
A fun beach scene with a stamped background.
Challenges
Kraftin' Kimmie Stamps blog 16 July Saturday challenge: Create a Stamped Background
Simon Says Stamp blog 11 July Monday challenge: Flora and Fauna
Simon Says Stamp blog 13 July Wednesday challenge: Create a Scene
Simon Says Stamp blog 29 June Work it Wednesday challenge: Dies or Stencils


Oh, very nice card!! I love your creation a lot!!!
ReplyDeleteGorgeous card Rijacki, I love how you masked the image to create a lovely scene, the whole design is fabulous :-)
ReplyDeletethanks for joining us on the Simon Says Stamp Monday Challenge
luv
Lols x x x
Thank you!
DeleteAdorable seaside scene card, love that you post shows so well how you masked and made the card.
ReplyDeleteThank you for joining us at Simon says Stamp Wednesday Challenge.
Luv
Debby