

The fabulous Floatin' Fiona by Annie Roderique for Kraftin' Kimmie Stamps is once more the focus of my card makin' fun. This time I decided to use water colours and a more simple layout.
For the month of June, I am thrilled to be a Krafty Guest designer for KKS and to have helped preview Floatin' Fiona as part of the new June release for KKS. Check out the KKS blog for previews of all the stamp sets in the release in dozens of wonderful creations! The June release became available just last night on the brand new KKS Krafy Shop (same address, new look).
To celebrate the new Krafty Shop, Kimmie has gifts for US!!! EVERY order placed this weekend will receive a special little extra something in the package!!! Could be a stamp, maybe buttons, sequins, enamel dots, flowers, brads....who knows! It'll be a fun SURPRISE!!! Kimmie just wants to say THANK YOU for being such an amazing and loyal customer to Kraftin' Kimmie Stamps!!! (Even if it's your first time ever *grin*)
At the bottom of this post are the links for the blog hop of the Krafty Designers and Krafty Guest Designers. You really want to see what everyone has done!

Supplies for my project


Putting It Together
For this Fiona, I decided I wanted to do a little painting with watercolours and finally use the water brushes I had picked up a while ago. I have fallen completely in love with them in my first use!

I stamped Fiona with Colorbox Black and embossed it with clear embossing powder. Using clear embossing powder over ink creates a resist. I wanted crisp black lines for this card, so embossing the lines worked perfectly. This does make the lines a bit shiny, I actually like that for this project, too. There are techniques to de-shine the embossing which I'll use on a different project on a different day :)

I also stamped her on some scratch paper thinking I might want to have a mask if I decided to to sky or something.I fussy cut her mask and then ended up not using it for this project *laugh*

I used Distress Ink to paint her skin, a mix of Antique Linen and Spun Sugar.

I used Distress Inks and watercolour paints for her suit, float, hair, and all.
hair: Vintage Linen, Scattered Straw, and Spiced Marmelade (pad and pen)
suit: Shaded Lilac pad and Dusty Concord pen
float: watercolours from the stacked disc
eyes: Peacock Feathers (I love the intensity of the blue green!)
ball: Mustard Seed and I don't remember *laugh*

I didn't like the way the ball looked so I added Peeled Paint for green stripes. I also painted the water, (Peacock Feathers, Salty Ocean, and Broken China) and faded it out in a wash. On scrap paper, I tried a couple sky ideas but wasn't happy with them and decided to leave the sky unpainted.
I love love love the water brushes!

I set Fiona aside to dry. I didn't want to disturb any of the pools (such as with her eyes) so I didn't want to use a heat tool to speed up the watercolour drying.
Since I had the failed stamping (make sure to heat set your ink before watercolouring on it!), I had an image I could use to work on the positioning and layout. The reason this stamping failed is because I didn't heat set the ink before adding a wash of water. Shwush. Face all a mess.
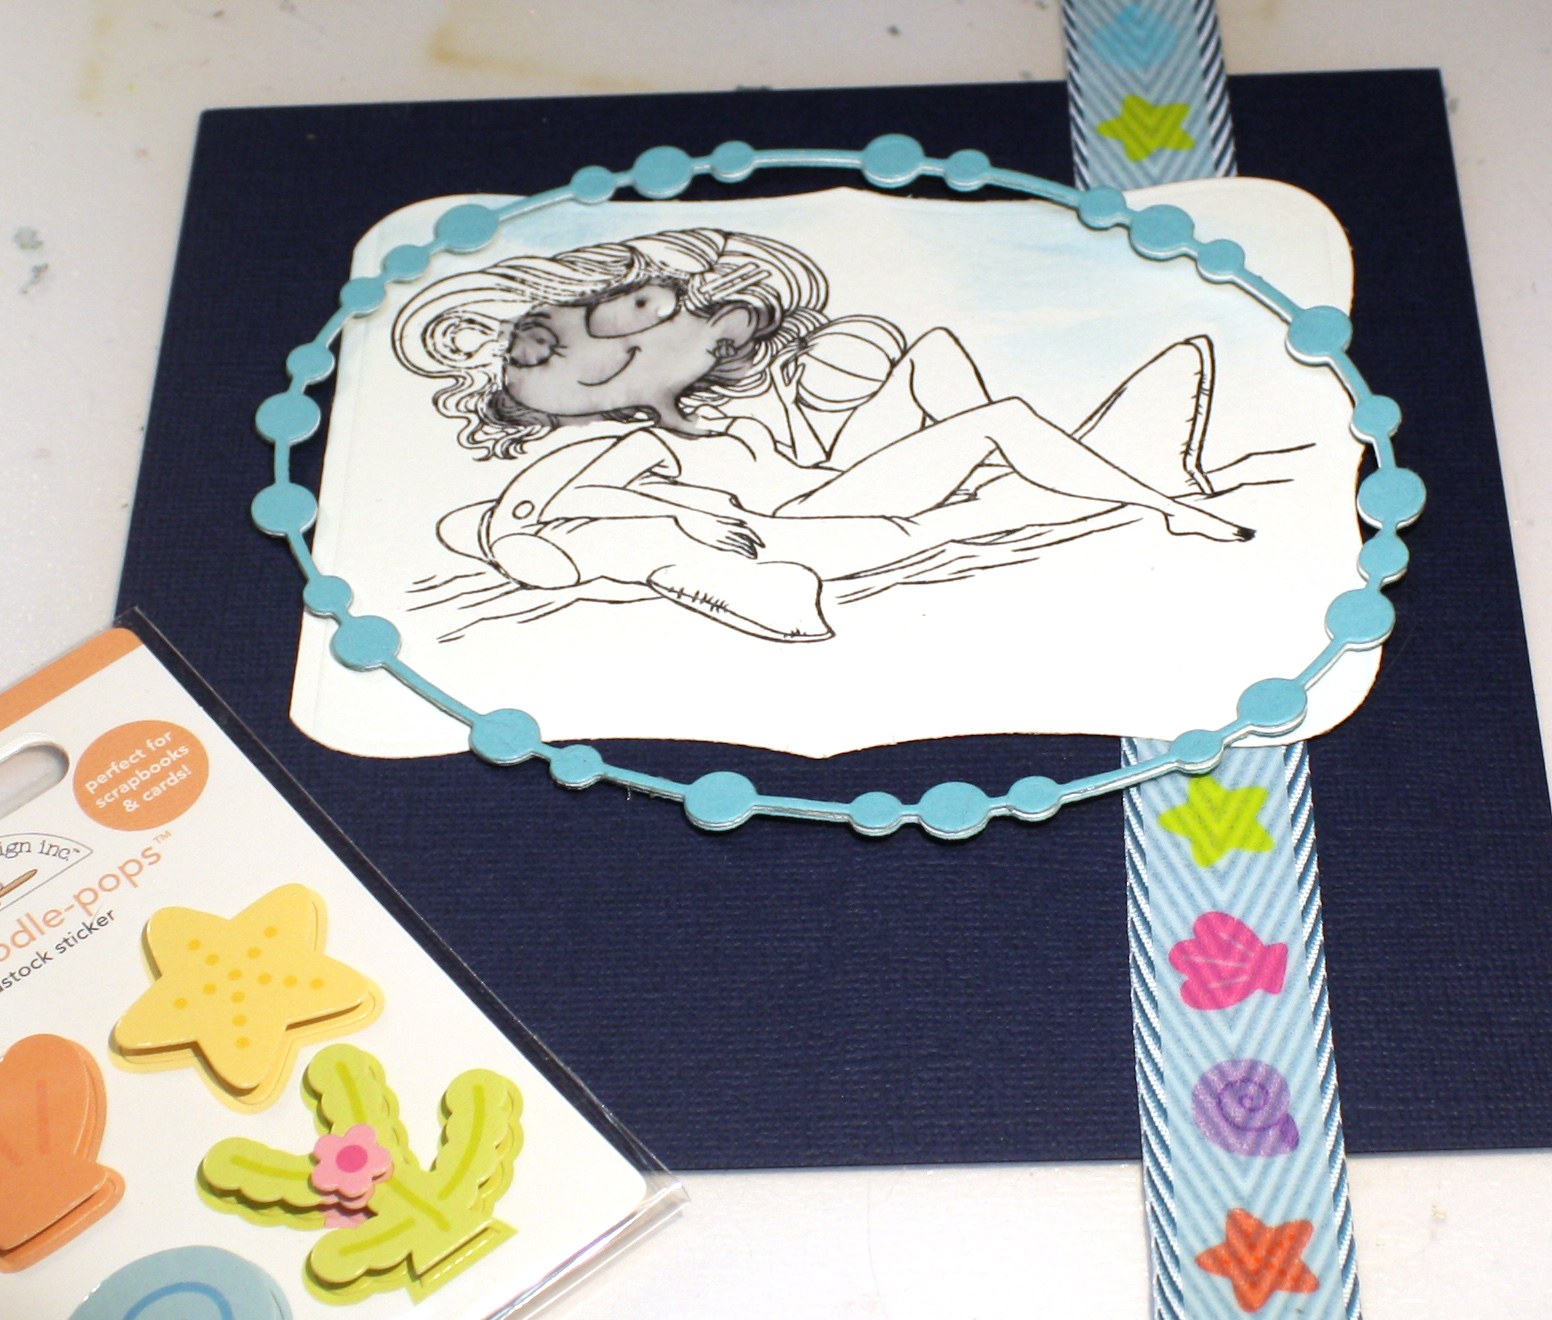
Anyway, because I handily had a failed image that was otherwise identical to my painted Fiona, I could work on adding other elements and the layout. In the latest release from Elizabeth Craft Designs, there are these wonderful beaded frames. I thought they would look great for Fiona. I only have the ovals (so far), so oval it is. I cut her with a Spellbinders matted square because I didn't want to lose the lovely ocean wash I did. The largest of the beaded ovals fit nicely around Fiona and within the second largest of the squares at a cant. I like the rakish aire of the tilt. I also tried out some Stampin' Up ribbon behind her and a dark blue background paper. I liked the elements but the ribbon wasn't entirely zinging.

I added Doodlebug Sweet Seashells washi tape over the ribbon and BING! Adding washi to ribbon is easy because the washi is a sticky tape. It does, though, make the tape stiffer, which actually helps for a band but probably not so much for a bow.

Since I wanted the beaded oval to have dimension but felt it would be too flimsy to foam dot it, I cut several of them from the light teal and white 65lb cardstock and then glued them together.

I tried a different shape and layout direction for Fiona (and you can see my sky experiment, too, in the background of the stamp) but didn't like the way it felt. I did like the idea of bringing in the card stickers, though.

I stamped the sentiment, "You float my boat!", (included in the Floatin' Fiona set) in white on the dark blue background and adhered the ribbon + washi by taping it to the back with some ordinary cello tape.

I glued the beaded oval to Fiona's background and then, using foam tape, added them to the background leaving a gap in the foam tape over the ribbon to have a smooth face. Then I added two shells from the card sticker pack and attached the whole thing to a craft paper card base, covering the front completely. I also added a bit of Wink of Stella to the beads on the oval to give them a touch of sparkle.

Aren't her eyes divine?

I stamped Fiona with Colorbox Black and embossed it with clear embossing powder. Using clear embossing powder over ink creates a resist. I wanted crisp black lines for this card, so embossing the lines worked perfectly. This does make the lines a bit shiny, I actually like that for this project, too. There are techniques to de-shine the embossing which I'll use on a different project on a different day :)

I also stamped her on some scratch paper thinking I might want to have a mask if I decided to to sky or something.I fussy cut her mask and then ended up not using it for this project *laugh*

I used Distress Ink to paint her skin, a mix of Antique Linen and Spun Sugar.

I used Distress Inks and watercolour paints for her suit, float, hair, and all.
hair: Vintage Linen, Scattered Straw, and Spiced Marmelade (pad and pen)
suit: Shaded Lilac pad and Dusty Concord pen
float: watercolours from the stacked disc
eyes: Peacock Feathers (I love the intensity of the blue green!)
ball: Mustard Seed and I don't remember *laugh*

I didn't like the way the ball looked so I added Peeled Paint for green stripes. I also painted the water, (Peacock Feathers, Salty Ocean, and Broken China) and faded it out in a wash. On scrap paper, I tried a couple sky ideas but wasn't happy with them and decided to leave the sky unpainted.
I love love love the water brushes!

I set Fiona aside to dry. I didn't want to disturb any of the pools (such as with her eyes) so I didn't want to use a heat tool to speed up the watercolour drying.
Since I had the failed stamping (make sure to heat set your ink before watercolouring on it!), I had an image I could use to work on the positioning and layout. The reason this stamping failed is because I didn't heat set the ink before adding a wash of water. Shwush. Face all a mess.
Anyway, because I handily had a failed image that was otherwise identical to my painted Fiona, I could work on adding other elements and the layout. In the latest release from Elizabeth Craft Designs, there are these wonderful beaded frames. I thought they would look great for Fiona. I only have the ovals (so far), so oval it is. I cut her with a Spellbinders matted square because I didn't want to lose the lovely ocean wash I did. The largest of the beaded ovals fit nicely around Fiona and within the second largest of the squares at a cant. I like the rakish aire of the tilt. I also tried out some Stampin' Up ribbon behind her and a dark blue background paper. I liked the elements but the ribbon wasn't entirely zinging.

I added Doodlebug Sweet Seashells washi tape over the ribbon and BING! Adding washi to ribbon is easy because the washi is a sticky tape. It does, though, make the tape stiffer, which actually helps for a band but probably not so much for a bow.

Since I wanted the beaded oval to have dimension but felt it would be too flimsy to foam dot it, I cut several of them from the light teal and white 65lb cardstock and then glued them together.
I tried a different shape and layout direction for Fiona (and you can see my sky experiment, too, in the background of the stamp) but didn't like the way it felt. I did like the idea of bringing in the card stickers, though.

I stamped the sentiment, "You float my boat!", (included in the Floatin' Fiona set) in white on the dark blue background and adhered the ribbon + washi by taping it to the back with some ordinary cello tape.

I glued the beaded oval to Fiona's background and then, using foam tape, added them to the background leaving a gap in the foam tape over the ribbon to have a smooth face. Then I added two shells from the card sticker pack and attached the whole thing to a craft paper card base, covering the front completely. I also added a bit of Wink of Stella to the beads on the oval to give them a touch of sparkle.

Aren't her eyes divine?
What I learned
- Water brushes are the cat's meow! They're effortless.
- Heat set your ink after stamping :)
- Distress Ink pads really do make great watercolours. (dab a little on your plastic or silicone craft mat and pick up from there)
Great card!!! I love all the pictures of your card process! Gorgeous card and you did a great job with watercolouring!
ReplyDeleteThank you! I like writing (can you tell *laugh*)
DeleteI love that you took us through the process! Ha ha ha and yeah I hate when I do super crafty things and then don't even use them. Ha ha awesome card girl!!
ReplyDeleteThank you! I like writing and showing how I did stuff. Hopefully it helps other budding artists but it also continues me on my path, too. :)
Deletelove the step-by-step process you showed! great card!
ReplyDeleteThank you!
Delete