

Happy Birthday to you! This little mousie would like to help celebrate this Autumn birthday. The card is a shaker easel with a built in pocket for a gift card that doesn't make the card look incomplete when the gift card is out (it's part of the stand-helper in the base *grin*).
Challenges
House Mouse and Friends: Autumn
Simon Says Stamp Monday challenge: Inspired by Music (Happy Birthday song)
Simon Says Stamp Wednesday challenge: Gift It
Tuesday Throwdown: Easel card
Crazy 4 Challenges: Sketch (turned on the side)
Art Impressions: To Die For
Crafty Cardmakers: Autumn
Creative Moments: Fall Colours
Crafty Gals Corner: Critters
Your Next Stamp: Fall Colours
Just For Fun Rubber Stamps: Fall
Scor-Pal: Cards
Supplies


I should add "taking pictures with a dodgy older camera" to my list of challenges *laugh*
But, about the card.. I got the idea when I was perusing challenges. I have an exceedingly small collection of House Mouse stamps so it is a bit of extra challenge to conceive of something which will use one of my few and still stay in theme for their challenge. Their theme's challenge this fortnight is autumn. I have a mouse with a stack of books, a mouse with a gift of cheese, a bunny with a kite, a bunny in a bath, and a little bunny giving something to a bigger bunny. While pondering those, I was also half thinking about the SSS challenge for "Inspired by Music" and thinking about stuff in my stash. Oh, thought I, I have a 12x12" sheet with music on it, I forget what that is.. Evernote swoops in like a superhero (I have a lot of my stash stored as notes so I can reference them when I am away from the workshop).. "Happy Birthday". The idea started brewing and percolating and dripping and... I might need a cup of coffee. I also thought abut the leaf dies I had from Stampin' Up that I just had to have but hadn't yet used *laugh* Those elements gave me the seeds to making the card.

I stamped the mouse giving a cheesy present on to watercolour card stock and painted him with Distress Inks before fussy cutting the image. I left a margin because of the details in the image. I had done the stamping in light and darker browns so I could do a "no lines" effect for the colouring. I used the Spellbinders hexagon to make the shaker window and a frame. For the background paper on the top, I used a retired Stampin' Up pad I got from my local demonstrator (*waves to Liane*). The colours fit in nicely with my mental vision.

I dry fit an idea together and then had to go to bed and the day job the next morning. Most weeknights I only get an hour or two to work on anything. The dry fit did confirm my idea was going to work but I needed something... more.

One thing sorely needed was converting the flat die cut paper into something actually resembling leaves. I used the blending tool and Distress Ink to 'nature up' the leaves. Much prettier. If you look at the dry fit picture above and this one, you can see the marked difference in the leaves. I used Recollections value cardstock for the leaves, but they definitely don't look inexpensive after this treatment.

To start putting it together, I affixed the sheet music card stock to the front panel of the card. I decided to make this as an easel card, so I had cut a 5.5" x 11" strip for the base, scored at 5.5" and 2.75", and a 5.5" square front panel. I cut the base from Neenah 110lb Solar White for a stronger easel. The front panel was cut from Stampin' Up Natural White. The front panel just needs to hold up to the shaker's stack of elements.

I cut the largest of the octagons from black fun foam and added it over the sheet music card stock. This will be the well of the shaker. The black is cut larger than the visible area of the window will be. I used black to be less noticeable from the side with all the dark colours.

To make the window, I used 2 sheets from Stampin' Up pads long long retied. I sandwiched a piece of acetate (recycled packaging) between them and added the frame. Using a frame around a window for a shaker hides the small alignment issues that invariably occur when trying to line up 2 die cut windows.

To get an idea of placement, I dry fit the mouse on the window. This would have looked good just like this, but I had all those lovely leaves.

So I added the leaves.

Then I added the mouse with foam mounting tape to give him dimension from the leaves and window. I added him directly to the window since there would be an opaque back to the shaker.

When making a shaker, it's easier to fill a well than to try to have the deeper part fit over the shaker stuff. I used a variety of glitter: red, orange, yellow, green, and bronze. All but the bronze have a slight iridescence.

I glued the window over the well, lining up the outside edges of the card. This is easier than trying to line up a window.

Inside, I used scraps from the sheet music card stock, the designer paper, and the glitter stock. I die cut hinge stand-up helpers from more scrap of the glitter stock (from the hexagon cut for the window). I attached the hinge back parts with foam mounting tape and also added more mounting tape to the bottom and sides below the hinges. The foam gives this bottom piece dimension. Not having any across the top creates a gift card pocket.

The front side of the pocket / stand-up helper. I also added leaves to tie it in to the front of the card.

With the pocket built into the stand-up helper, the card doesn't look incomplete when the gift card has been removed (to be used!). But, it keeps the gift card safely with the card as well.

I like shaker cards. This is the card closed.

An easel card makes it easy for the recipient to display the card.

Now, don't you wish you had an Autumn birthday?
But, about the card.. I got the idea when I was perusing challenges. I have an exceedingly small collection of House Mouse stamps so it is a bit of extra challenge to conceive of something which will use one of my few and still stay in theme for their challenge. Their theme's challenge this fortnight is autumn. I have a mouse with a stack of books, a mouse with a gift of cheese, a bunny with a kite, a bunny in a bath, and a little bunny giving something to a bigger bunny. While pondering those, I was also half thinking about the SSS challenge for "Inspired by Music" and thinking about stuff in my stash. Oh, thought I, I have a 12x12" sheet with music on it, I forget what that is.. Evernote swoops in like a superhero (I have a lot of my stash stored as notes so I can reference them when I am away from the workshop).. "Happy Birthday". The idea started brewing and percolating and dripping and... I might need a cup of coffee. I also thought abut the leaf dies I had from Stampin' Up that I just had to have but hadn't yet used *laugh* Those elements gave me the seeds to making the card.

I stamped the mouse giving a cheesy present on to watercolour card stock and painted him with Distress Inks before fussy cutting the image. I left a margin because of the details in the image. I had done the stamping in light and darker browns so I could do a "no lines" effect for the colouring. I used the Spellbinders hexagon to make the shaker window and a frame. For the background paper on the top, I used a retired Stampin' Up pad I got from my local demonstrator (*waves to Liane*). The colours fit in nicely with my mental vision.

I dry fit an idea together and then had to go to bed and the day job the next morning. Most weeknights I only get an hour or two to work on anything. The dry fit did confirm my idea was going to work but I needed something... more.

One thing sorely needed was converting the flat die cut paper into something actually resembling leaves. I used the blending tool and Distress Ink to 'nature up' the leaves. Much prettier. If you look at the dry fit picture above and this one, you can see the marked difference in the leaves. I used Recollections value cardstock for the leaves, but they definitely don't look inexpensive after this treatment.

To start putting it together, I affixed the sheet music card stock to the front panel of the card. I decided to make this as an easel card, so I had cut a 5.5" x 11" strip for the base, scored at 5.5" and 2.75", and a 5.5" square front panel. I cut the base from Neenah 110lb Solar White for a stronger easel. The front panel was cut from Stampin' Up Natural White. The front panel just needs to hold up to the shaker's stack of elements.

I cut the largest of the octagons from black fun foam and added it over the sheet music card stock. This will be the well of the shaker. The black is cut larger than the visible area of the window will be. I used black to be less noticeable from the side with all the dark colours.

To make the window, I used 2 sheets from Stampin' Up pads long long retied. I sandwiched a piece of acetate (recycled packaging) between them and added the frame. Using a frame around a window for a shaker hides the small alignment issues that invariably occur when trying to line up 2 die cut windows.

To get an idea of placement, I dry fit the mouse on the window. This would have looked good just like this, but I had all those lovely leaves.
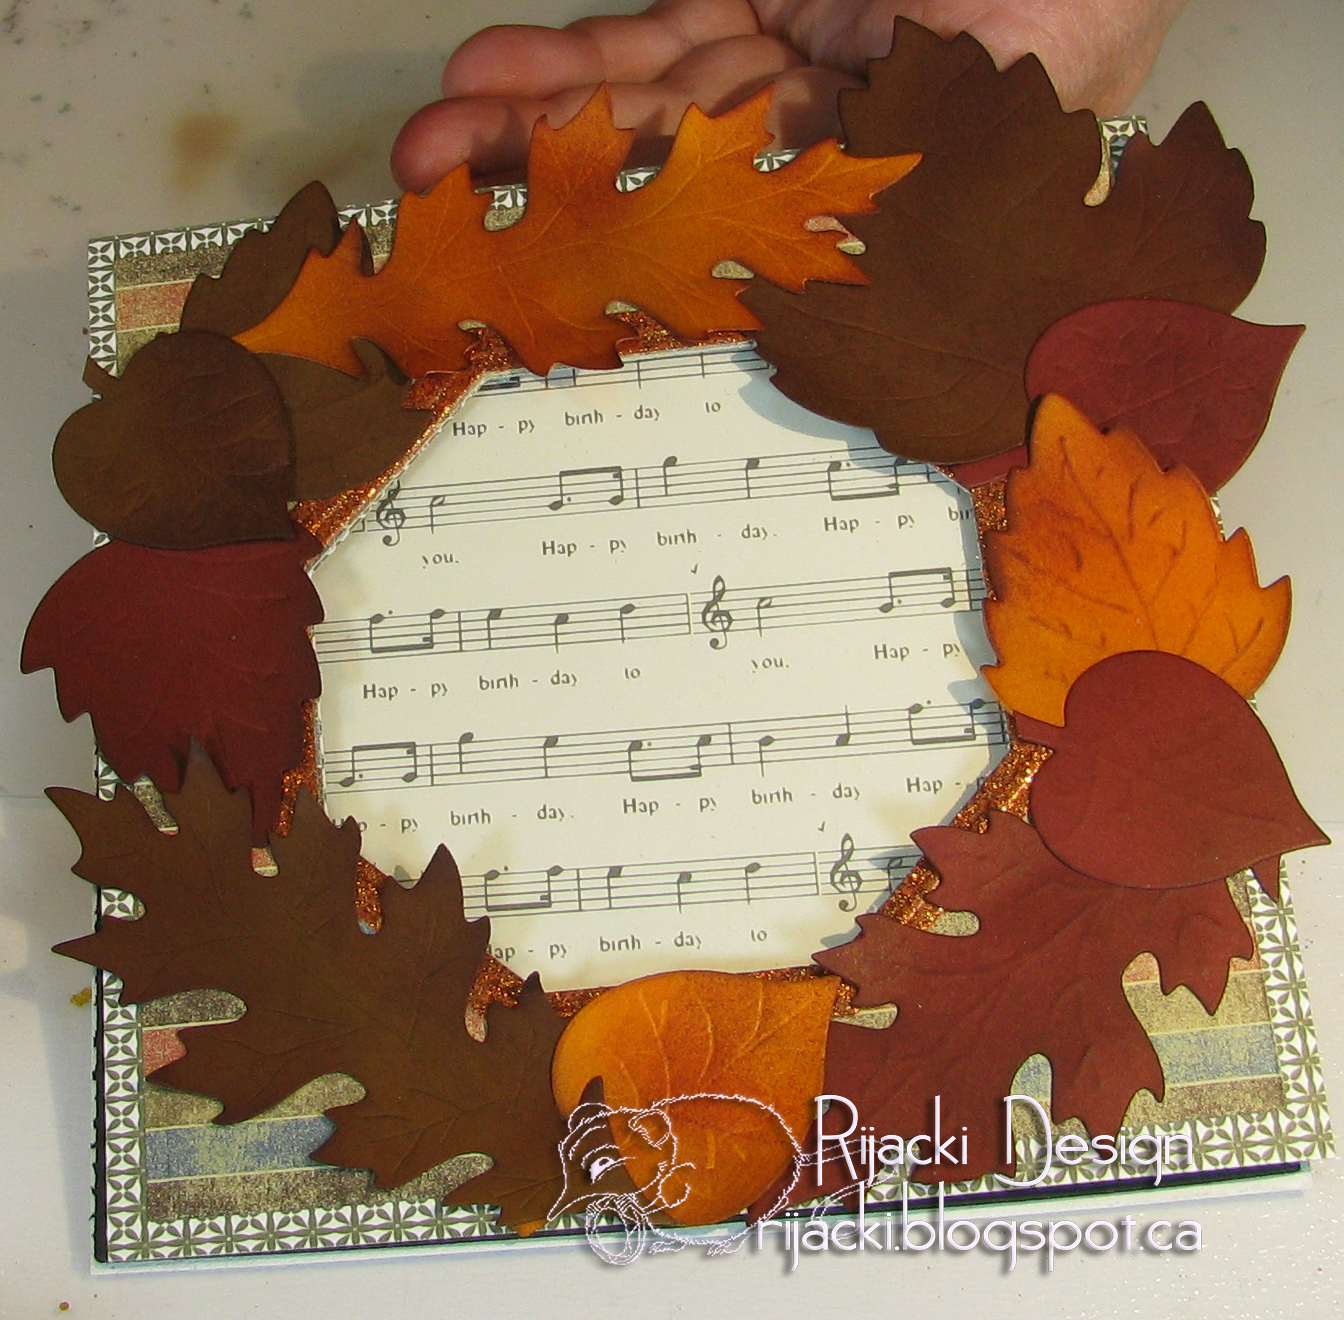
So I added the leaves.

Then I added the mouse with foam mounting tape to give him dimension from the leaves and window. I added him directly to the window since there would be an opaque back to the shaker.

When making a shaker, it's easier to fill a well than to try to have the deeper part fit over the shaker stuff. I used a variety of glitter: red, orange, yellow, green, and bronze. All but the bronze have a slight iridescence.

I glued the window over the well, lining up the outside edges of the card. This is easier than trying to line up a window.

Inside, I used scraps from the sheet music card stock, the designer paper, and the glitter stock. I die cut hinge stand-up helpers from more scrap of the glitter stock (from the hexagon cut for the window). I attached the hinge back parts with foam mounting tape and also added more mounting tape to the bottom and sides below the hinges. The foam gives this bottom piece dimension. Not having any across the top creates a gift card pocket.

The front side of the pocket / stand-up helper. I also added leaves to tie it in to the front of the card.

With the pocket built into the stand-up helper, the card doesn't look incomplete when the gift card has been removed (to be used!). But, it keeps the gift card safely with the card as well.

I like shaker cards. This is the card closed.

An easel card makes it easy for the recipient to display the card.

Now, don't you wish you had an Autumn birthday?
I do love the House Mouse images - and this is a really great design. Thank you for the step-by-step :), and for sharing it with us for our Fall Colours challenge at Creative Moments,
ReplyDeleteHugz Tinz
What a great way to turn this into a card for fall with the beautiful wreath! Lovely and fun card, Rijacki! Glad you joined us in our Monday challenge at Simon Says Stamp! xx Maura
ReplyDeleteWhat great Shaker card! And the leaves are,a great addition. Thanks for joining us at Crafty Gals Corner! Jeanie, DT
ReplyDeleteA beautiful easel shaker card. Love this rich colors of Fall. The gift card holder is also a great touch. Nice of you to share how you made this card too. Thanks for joining us for the House Mouse and Friends Monday Challenge and sharing your card with us.
ReplyDeleteHugs
Sue
Now isn't this the prettiest shaker card! Love that leaf wreath and that shiny shaker stuff!
ReplyDeleteThanks so much for sharing with us at House Mouse and Friends Monday Challenge.
♥ Sue Kment
Wonderful shaker card and love all the leaves!
ReplyDeleteThanks for joining us at Your Next Stamp!
Wonderful autumn easel gift card. LOVE all the fall leaves and colours. Thanks for sharing the tutorial as well as THANKS for playing along Simon Says Stamp Gift It challenge. Gayatri xx
ReplyDeleteOh my goodness, what an amazing card! I love the leaves around the shaker. Thanks for joining our challenge at Art Impressions!
ReplyDeleteFabulous easel card I love how you have used the leaves to make a wreath. Thanks for joining us at Crafty Cardmakers.
ReplyDeleteBec
That's really cute. I like the clever design where the card still looks complete when your gift card is removed.
ReplyDelete