

Beguiling young witch in Ravenclaw colours or Blue and Bronze casting a spell for a magical birthday.
Challenges
Kraftin' Kimmie Stamps Saturday: Birthday
Crafty Gals Corner: Birthday/Celebration
Through the Craft Room Door: Anything Goes
Inspiration Destination: Anything Goes
Penny's Paper-Crafty: Anything Goes
Crafty Gals Corner: Birthday/Celebration
Through the Craft Room Door: Anything Goes
Inspiration Destination: Anything Goes
Penny's Paper-Crafty: Anything Goes
Crazy 4 Challenges: C4C348 Olymic Colours or Sport (Blue and Bronze)
Craft Your Passion: Anything Goes
Addicted to Stamps and More: Anything Goes
Craft Your Passion: Anything Goes
Addicted to Stamps and More: Anything Goes
Supplies


Which witch? One of my co-workers said her niece likes Harry Potter and has a birthday coming up. So, I told my coworker to ask her niece which House she was sorted into. My co-worker, who hasn't seen the movies or read the books, did ask her niece who laughed as she said Ravenclaw. When my co-worker told me, I showed her the WiKi on Ravenclaw. She said it describes her niece well but was still a bit befuddled by it all *laugh*
So, for my co-worker's niece, I made a birthday card in the Ravenclaw colours of blue and bronze using one of the sets from the June release of Kraftin' Kimmie Stamps.

I stamped Witch Willa both on to Canson watercolour card stock and typing paper to use as a mask. When I stamp to make a mask I often use a non-black colour, like red, to make it easy to see when the mask has shifted and for pictures.

After fussy cutting the image, I put removable adhesive on the back of the typing paper mask and laid it over the black stamped image on the watercolour cardstock.

For a background detail, I cut another typing paper mask using a Tonic Studios Celtic Square die.

I positioned the square to give a detail at the bottom of a wall/corner.

I pounced Tea Dye Distress Ink on the mask/stencil.


I then masked off the knotwork to sponge the floor with Tumbled Glass.

I reversed the masking to cover the knotwork and top part of the floor. I sponged a light coat of Tumbled Glass on to the walls. With a stencil I had created for an earlier project by die cutting a border several times on a piece of acetate, I pounced on Weathered Wood as a wall paper. The die indicates the shapes are blossoms but I think they look a bit more star-like.

Before taking off the stamped image's mask, it looks a bit goofy.

Mask off, Willa is ready for painting.

And.. POOF! She's painted! I added tile lines and a wall like as well to give a bit of dimension.
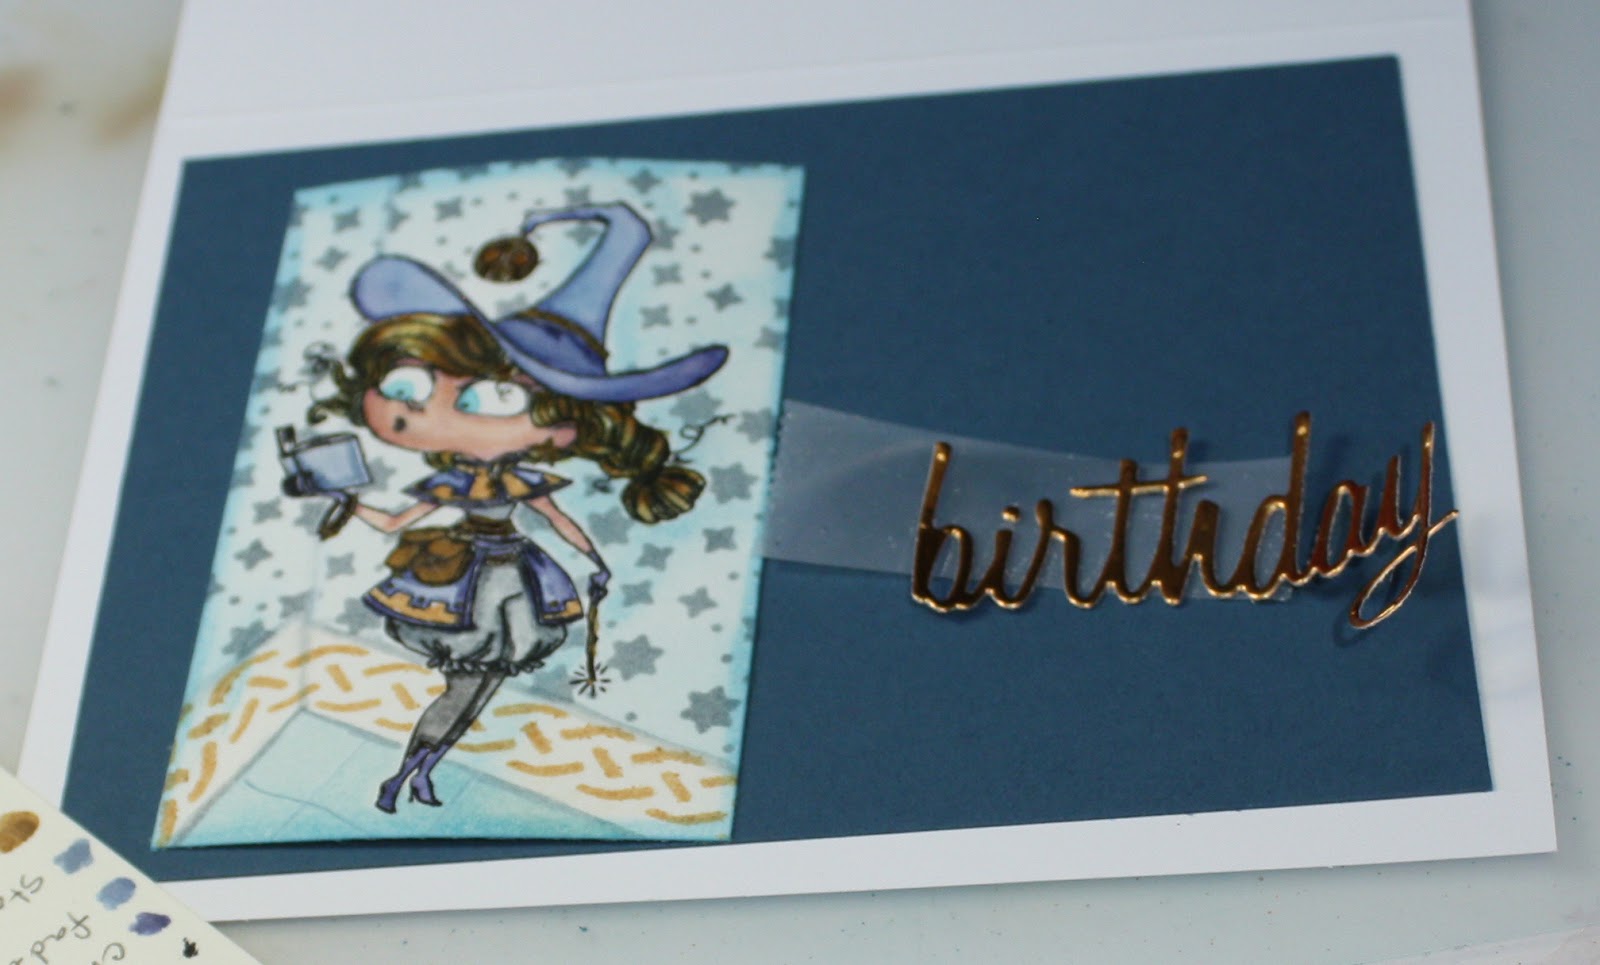
I die cut Happy Birthday from bronze foiled paper and decided I wanted to use Stampin' Up Not Quite Navy card stock to back the image. I dry fit the card a couple ways to come up with a layout.

This idea stuck. I trimmed Willa and sponged the edges a bit darker with Tumbled Glass.

I liked the "Have a Magical" from the Teacup Fairy set but the "Day" was redundant with the "Birthday" die cut I wanted to use. So.. I cut the sentiment apart to stack the parts I wanted and leave off the "Day". I can always mount them together for future projects, as if they'd never been apart. This is a tip from Jennifer McGuire I have used a few times now.

I stamped "Have a Magical" in white Picket Fence and embossed it with Wow White Pearl. I used the Xyron to add adhesive to the 'birthday" while adding the dot for the "i" with Multi-Medium Matte. Both the blue panel and the painted panel were adhered flat to the card base.

Three light blue gemstones finished the card.

Inside, I added another sentiment and the frog from the Witchin' Willa set.


Three light blue gemstones finished the card.

Inside, I added another sentiment and the frog from the Witchin' Willa set.

I love your card, she looks beautiful in blue!! Thanks for joining our challenge this week with Kraftin Kimmie Stamps.
ReplyDeleteMarilyn DT
Thanks for such a great card, tutorial & joining us at TTCRD xx Jan DT
ReplyDeleteGreat card!!! I loved to see how you made it. Thanks for sharing with us at Inspiration Destination this week. Good luck!!! Patricia
ReplyDeleteGreat tutorial on how you did this Fabulous card...love your design and you show us how very creative and full of ideas you are...thank you for joining us at ATSM...hugs Željka
ReplyDeletesuch a great card - love your coloring - thanks for joining us at Addicted to Stamps and More
ReplyDelete