An Icy Fairy to skate her way into your heart, this card features stenciling, Distress Oxides, Distress ink colouring, Viva inka Gold, sequins, and wintery colours on a hot summer day.
Supplies
These are not affiliate links just the products I use and where you can find them, too (if they're not retired).
Lots of pictures in the "Putting It Together" this time as I show how I did the background as I had fun with stenciling.
I made the background entirely separate from the fairy and without this card in mind. I was experimenting with a new-to-me item I added to my stash from a garage sale hosted by a local scrapbooking store, Inka Gold. I wanted to try it with stenciling, to see if it would act as a resist. I also wanted to use the fantastic lacey stencil I got from Simon Says Stamp.
I secured a heavy (140lb) watercolour panel to my work surface with washi. I laid the stencil over the panel and secured it on one side with washi. Securing just one side, it can be lifted like a door on a hinge to see the progress underneath. This is especially helpful with an intricate stencil like this one.
On my first go 'round, I used a make-up sponge to apply the silver Inka Gold. This left a very thin film of it on the panel.
After I applied the Distress Oxides and wiped the panel, the effect was very subtle. It's pretty, but I decided I wanted a bit more from the Inka Gold so I decided to try again (I'll use this panel in some other project because it is very lovely).
On a new panel, I decided to spread the Inka Gold like a paste using a palette knife.
When I lifted the stencil on the washi hinge, I could see that some of the more intricate spots hadn't gotten any of the paste, so I used a make-up sponge to pounce the more intricate areas and squish the Inka Gold through the stencil.
Lifting the stencil, there are some areas which are thicker than others but overall, it looked great. I set it aside to dry thoroughly.
On the dried panel, I used a blending tool to add Distress Oxide in patches: Wilted Violet, Cracked Pistachio, and Faded Jeans.
I used a wet wipe to wipe down the panel and remove some of the ink from the silver. The wipe also soften the colours.
With the washi removed the panel is quite pretty.
The texture and colours are rather pretty. I set the panel aside for a couple days until the idea for this card popped in my head. The colours in the panel reminded me of pictures I've seen of the aurora borealis.
I stamped the fairy in blue...
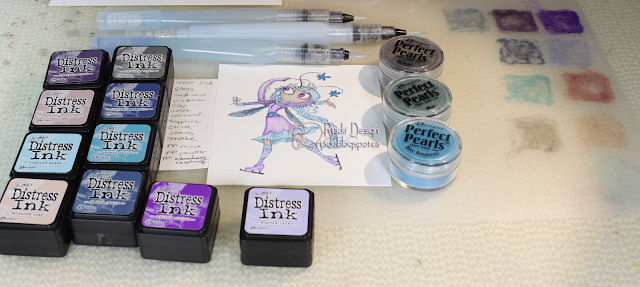
.. and painted her with Distress ink and Perfect Pearls.
I fussy cut the fairy and dry fit the fairy on the panel. I decided to use the silver corner almost like a sun or moon.
Inside, I decided to stencil on some snowflakes. I first used Tumbled Glass and then brushed it with Perfect Pearls. I meant to use either the pearl or Confetti White, but grabbed the Biscotti from my drawer instead. But, the slight colour does make it more visible so it was a "happy accident".
I used the Distresser Tool on the edges of the background panel and attached it to the card base with Scor-tape for a more secure adhesion.
I used foam mounting tape to adhere the fairy and give her some added dimension. I added clear iridescent sequins to the background and a tiny flower sequins to the antennas. I also added a dot of Stickles to her braid.
For the inside, along with the stenciled snowflakes, I stamped one of the Icy Fairy's sentiment with purple ink.
Challenges
Kraftin' Kimmie Saturday: Sequins
Simon Says Stamp Monday: Distress It
Crafty Hazlenut's Christmas: Snow Flakes
Creative Craft Cottage: Christmas in July
Creative Moments: Christmas in July
More Mixed Media: Pastel
Pearly Sparkles: Girlie
Through the Craftroom Door: Anything Goes
Crafty Hazlenut's Christmas Extra: Anything Goes
Christmas Cards All Year 'Round: Anything Goes


Thanks for entering both of my CHNC challenges with your lovely crafting - hope to see you again soon. x
ReplyDeleteGorgeous card, Rijacki! Love the wintry colors, and your fairy is so beautifully colored. What a great way to beat the heat by using winter colors and ice skating :) I'm so happy you shared your beautiful project with us at Simon Says Stamp Monday Challenge! hugs, Maura
ReplyDeletesweet card. interesting background. thank you for sharing it with us at TTCRD and good luck, Theresa DT xx
ReplyDeleteThis is lovely, Rijacki! That color combo is just perfect, and your distress ink coloring of the fairy image is stunning! Thanks so much for sharing this beauty with us at CCAYR! :)
ReplyDelete~Marie B -DT
Love your background! Thank you for the instructions on how to make it. Thank you for joining us at Creative Craft Cottage. Cindy (DT)
ReplyDeleteBeautiful background on your card - perfect to showcase your cute image. Love the colour combo you used. Thank you for playing along with us at CCAYR.
ReplyDeleteHave a wonderful day!
♥ Lena ~ DT
Lena’s Creations
Must try this technique!
ReplyDeleteThank you for sharing with Crafty Hazelnut's Christmas Extra!
Susan
DT for CHNC Extra!
Calling All Crafters! – My personal Blog!