

All in the name of love, resist-ance is not futile. It can make some really pretty cards.
I fashioned this Valentine card using the emboss resist technique, a background stamp from Simon Says Stamp, and the January 2018 My Monthly Hero kit.
#MyMonthlyHero
Putting It Together
I wanted to do a relatively simple card today since I have been sick for a couple weeks. Emboss resist is relatively easy to do.

To stamp a large (6" x 6") background stamp with the MISTI on an A2 (5 1/2" x 4 1/4") panel, I use removable adhesive on the back of the panel. I then adhere it to a grid sheet for the MISTI which has been laminated. I also take out the foam spacer because all the large background stamps I have are foam mounted rubber. Temporarily adhering the panel allows me to stamp without the paper moving. I can even double stamp if needed.

I lay the stamp over the panel, completely covering it, and then close the door to pick up the stamp on the door.

The easiest resit technique is to emboss a stamped image. To prepare for embossing, I use a powder tool. If the powder isn't coming out enough, you can tap it or shake it. A pad-like powder tool might be more effective for a large area. I don't have one.

With the stamp on the door, I go over it with VersaMark, making sure to ink up all areas which will cover the panel. (I usually end up inking up the whole stamp 'cause I can't determine the mirror placement).

It's really hard to see in the picture, but the inking is edge to edge.

Cascading the embossing powder over the VersaMark makes it magically appear.

I used the Pink Prisma from the January My Monthly Hero kit. It's a gorgeous pink with a bit of sparkle. Before hitting it with the heat tool.


After embossing the pink is a lighter but the embossing is a plastic which will resist ink.

I used a blending tool and added two of the inks from the January My Monthly Hero kit, one to each side blending in the middle: Red Royal and Mulled Wine. After adding the ink, it's easy to see where I flubbed the stamping/embossing either by accidentally wiping away powder or not getter a clear impression (usually from uneven pressure or a missed spot while inking).

I used a moist towelette to wipe the top of the embossing and to allow the pink to shine through brighter.

I trimmed the panel which also got rid of the biggest flaws. I decided to use the Stardream Rose Quartz half-sheet to make an A2 card base and dry fit the resist emboss panel.

To finish the panel, used a blender to add a small bit of Navy ink (also from the kit) to the edges. This will make it stand out more from the pink card base.

I decided to use some scrap Bristol paper to try the layered sentiment, Love. I first stamped with the Red Royal and then heat set it. Then, to line up the top layer, I used plastic from packaging. I put the plastic down over stamping and then the layer stamp. This allows me to move the stamp easily without having to pick it up and try to put it down in the right spot. This is also helpful if the stamp might have any ink on it from a previous stamping. Once it's in place, simply close the door and peel off the plastic from the stamp.

With the stamp on the door, I use the powder tool to prep for embossing.

And, embossed with the Pink Prisma. Love the details in the layering.

I loved how the layer worked and decided I wanted to die cut edging. However, since I used scrap to try the stamping, it was nearly too narrow. I would need to do a very tight double die cutting.

First pass to trim the bottom.

Second pass to trim the top, moving the die down to match the sides. I dry fit the trimmed sentiment panel on the emboss resist panel.

For the inside, I used the plastic positioning technique to allow me to place the corner stamp in the opposite corner without getting stray ink on the card from the first stamping. Plastic down on the card or stamping surface, place and adjust the stamp, close the door to pick up the stamp, and then just peel off the plastic. Just be sure you don't put an inky side of the plastic down on the card.

I decided to make a relatively flat card. This goes through the mail easier. Before I adhered the two panels to the card base, I stamped "you" to the open area on the Love panel. I adhered both panels with tape runner. I used the Love panel to hide the less than perfect spot in the background panel.

Inside, I used the Bumble Gum ink from the August 2016 My Monthly Hero kit to stamp the corner flourishes from the January 2018 My Monthly Hero kit. The pink on pink is a nice soft look tying into the front of the card. I stamped "so much" from the January kit in Red Royal to complete the sentiment from the front.


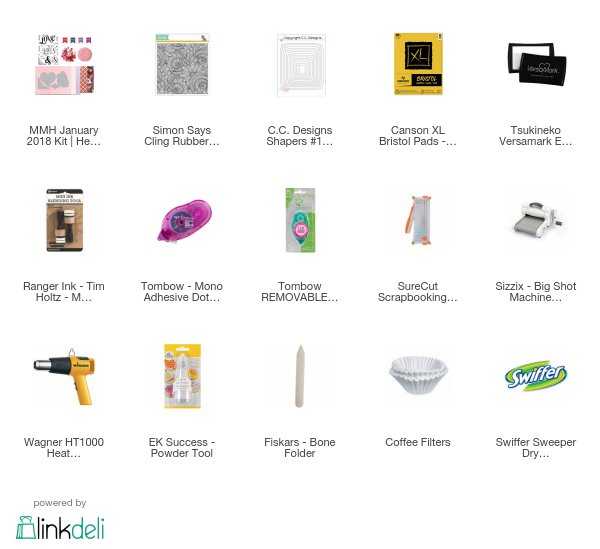
Supplies
Challenges
Simon Says Stamp Monday: Resist It
Love to Scrap: I Love You
Scrapping 4 Fun: Love, Valentine
Addicted to Stamps & More: Make Your Mark
Try It On Tuesday: Hot or Cold (hot colours - reds)
Tuesday Throwdown: Favourite Colour (red!)
Simon Says Stamp Wednesday: Anything Goes
Watercooler Wednesday: Anything Goes
Love to Scrap: I Love You
Scrapping 4 Fun: Love, Valentine
Addicted to Stamps & More: Make Your Mark
Try It On Tuesday: Hot or Cold (hot colours - reds)
Tuesday Throwdown: Favourite Colour (red!)
Simon Says Stamp Wednesday: Anything Goes
Watercooler Wednesday: Anything Goes
Hi Kate, I love the emboss resist technique. Having that design appear when you've sponging the colour on is almost like magic, isn't it? And what a design you've stamped and embossed! It's marvellously intricate and the details really lend themselves beautifully to this technique. Great choice of sentiment you've added as well. The layered details are lovely. The pink border stamps inside finish the card off beautifully. Thanks so much for joining our Watercooler Wednesday Challenge this week.
ReplyDeleteThe background of your card is amazing. Great technique!
ReplyDeleteLia DT S4F
Thanks for sharing your beautiful card with us at Try it on Tuesday this time. Love the technique!
ReplyDeleteWhat a wonderful card! The design is lovely and I love the shine from the Pink Prisma embossing powder too 😁. Thanks for joining us at Try it on Tuesday with your beautiful fiery red card! J 😊
ReplyDeleteBeautiful card, so elegant. Love the stamp pattern and the ombre coloring. Thank you for joining us at Simon Says Stamp Monday Challenge!
ReplyDeleteLoving this emboss resist "love" card. It's totally beautiful inside and out. The little tutorial you included is absolutely perfect and inspiring for those who may not have tried it before. I love the detail you were able to achieve and I believe the Misti is really a cool way to ensure that. Thanks for playing along with us at the Watercooler Wednesday "Anything Goes" challenge this week. Awesome!
ReplyDeleteGreat tutorial and a beautiful card. [Bunny]
ReplyDeleteA really lovely card and super step by step details on how you made it. Thank you for sharing it with us at TioT's this time.
ReplyDeleteYvonne
Very nice card thanks for sharing!
ReplyDeleteWhat a great technique and your card is beautiful. I love that you made the inside pretty too.
ReplyDeleteThanks for sharing with us at ATSM.
Gorgeous card Rijacki! The background you've created looks wonderful.
ReplyDeleteThanks for joining us at Simon Says Stamp Wednesday Challenge
Mandy xx
Very beautiful and elegant. Thank you for joining us at ATSM Challenges. Hope to see you again soon. Nandini, DT
ReplyDeletevery pretty. Thanks for sharing thesteps rijacki. a wonderful card. Thanks for playing along with us at Scrapping 4 Fun Challenge.Hope to see you again
ReplyDeleteShylaa DT@S4F
Adhiraacreations
You have created an absolutely wonderful card here! Great work and thank you so much for sharing your talents with us for this month's Love to scrap 106 Challenge!
ReplyDelete